Spring in the Edwardian House

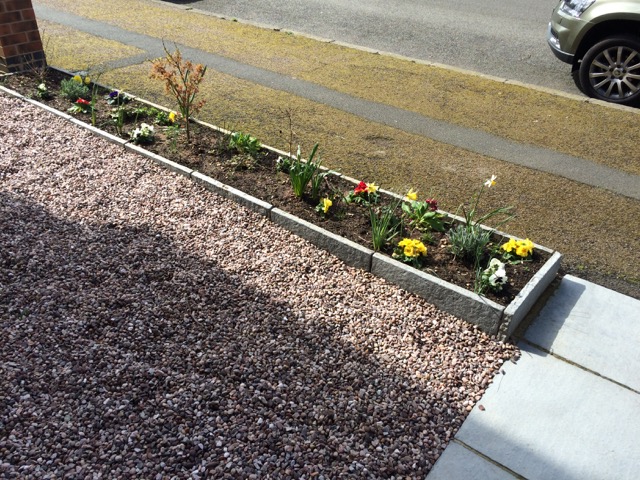
Here we are in early April and Spring is definitely upon us. The first of the daffodils.

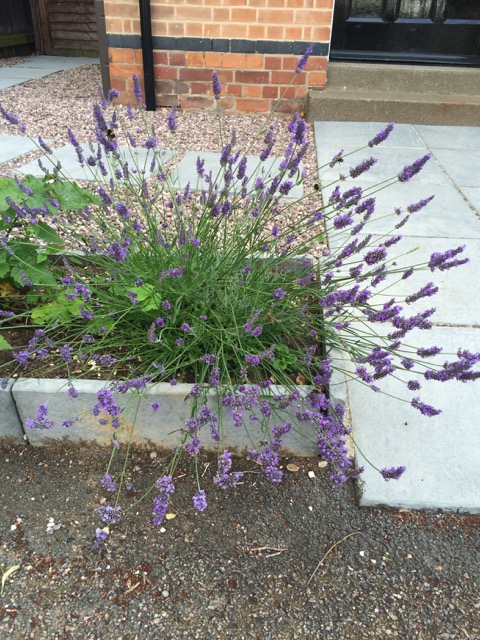
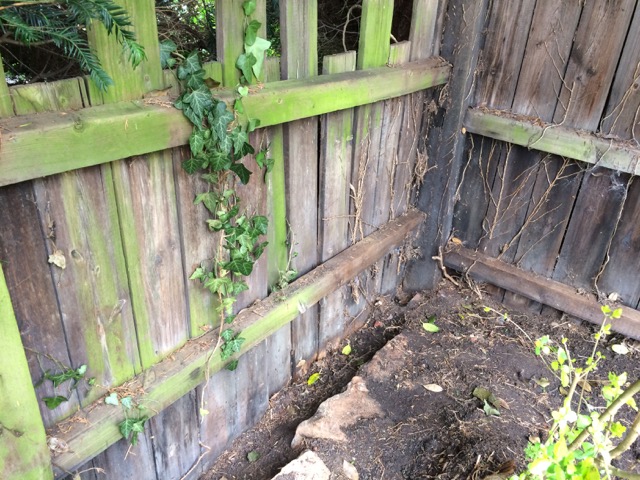
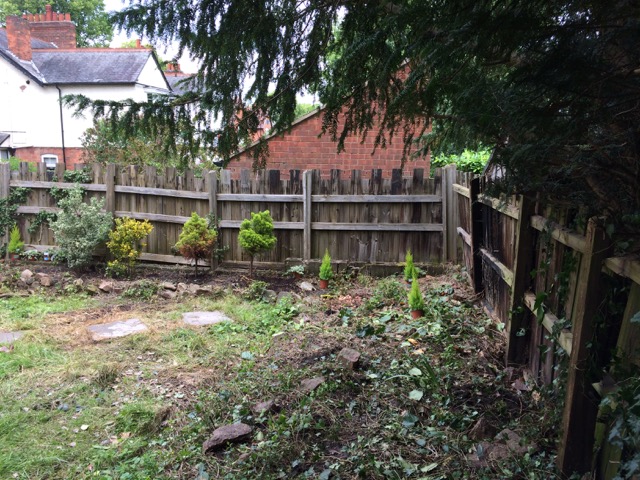
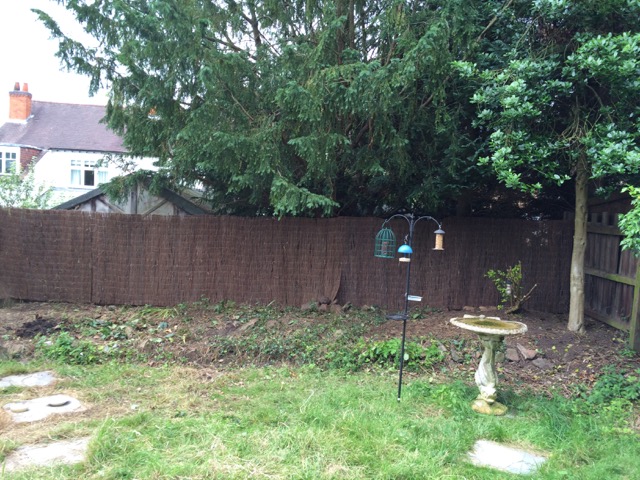
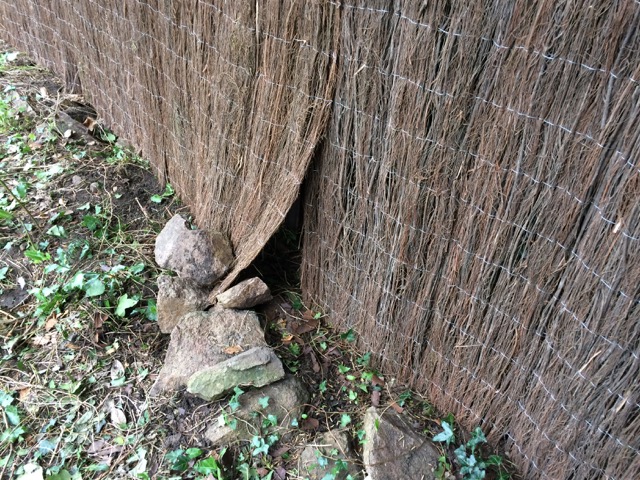
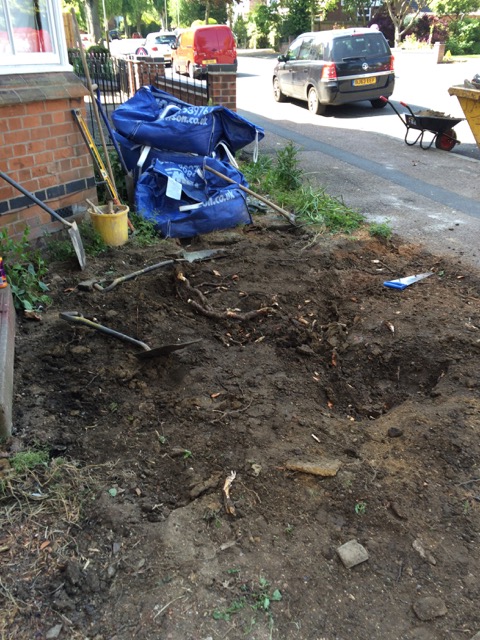
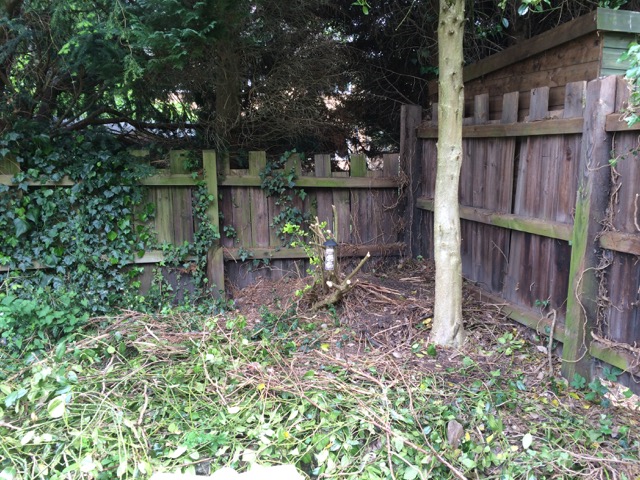
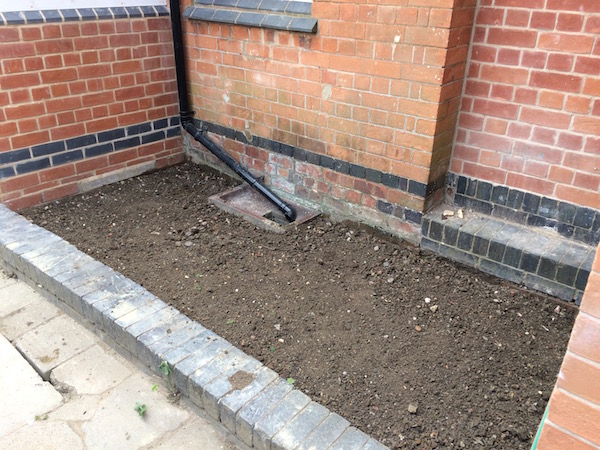
I have managed to do a little gardening – I mowed the lawn for the first time this year two weekends ago. There is a lot of weeding to be done as you can see in this pic. To the left of the photo you will see a gap in the fence under the brush screening I put up last year. This is because the neighbours behind us have demolished their shed and will be repairing the fence and re-landscaping their garden, as well as extending their house. It is a welcome change as the shed was rather dilapidated and sat right up on the boundary line.

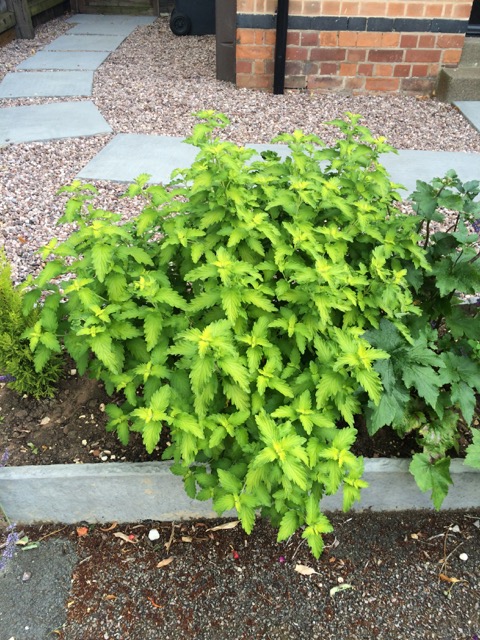
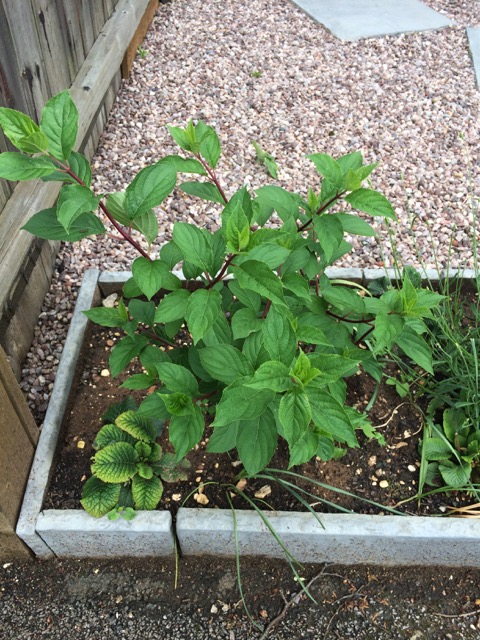
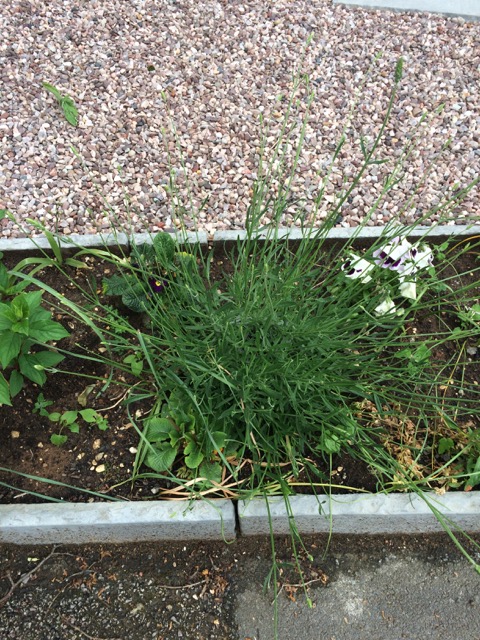
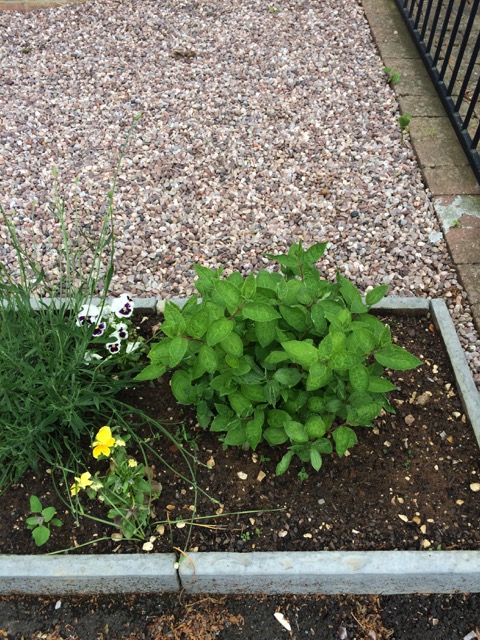
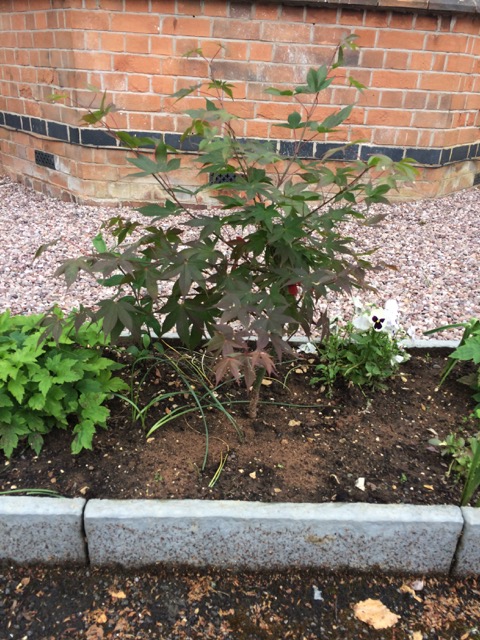
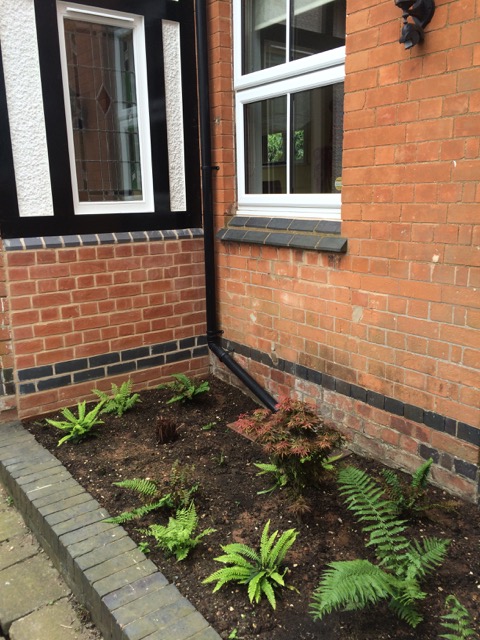
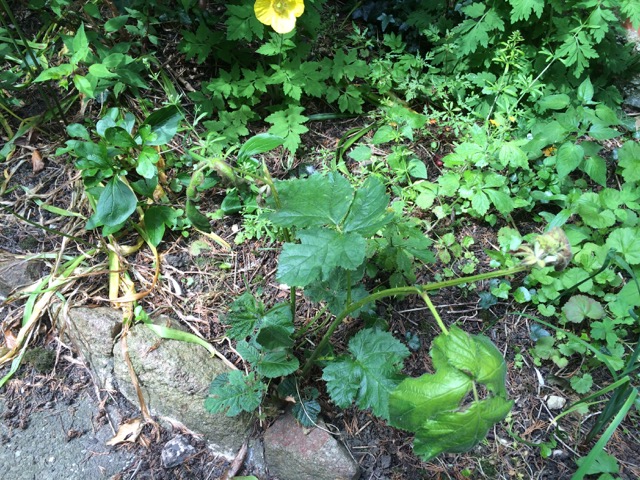
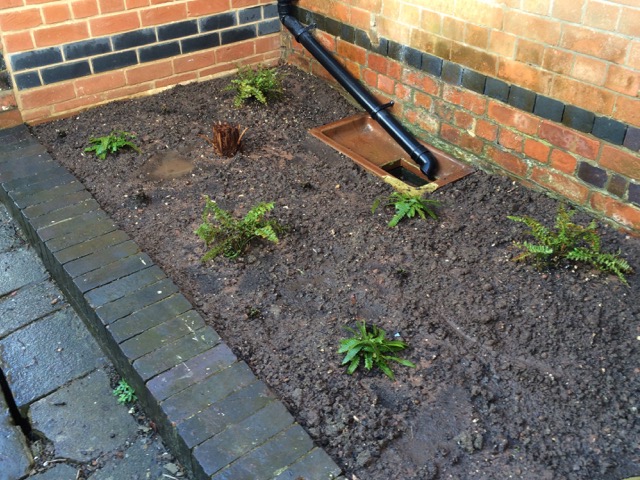
I have also been doing some planting. Here are some ferns that have just gone in recently. I also planted some azaleas and ground cover in another garden bed but as yet do not have any photos.

While I was digging in the garden beds, I discovered two more medicine bottles buried in the back garden. You may remember the mystery of the hidden tranquilisers from several years ago.

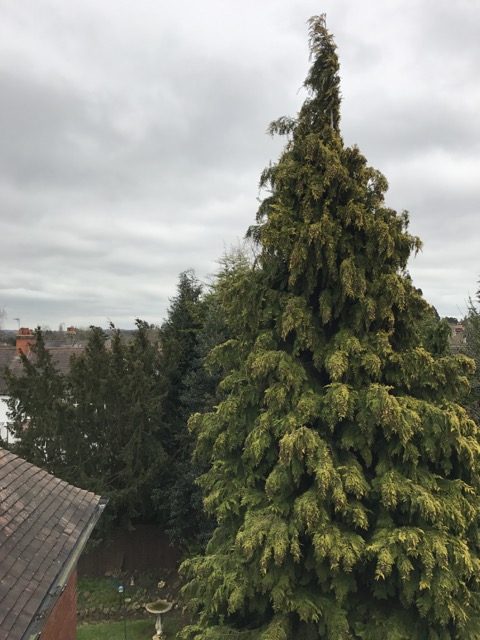
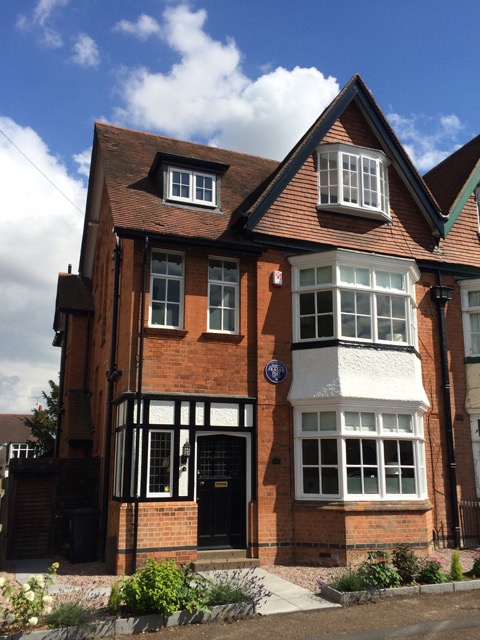
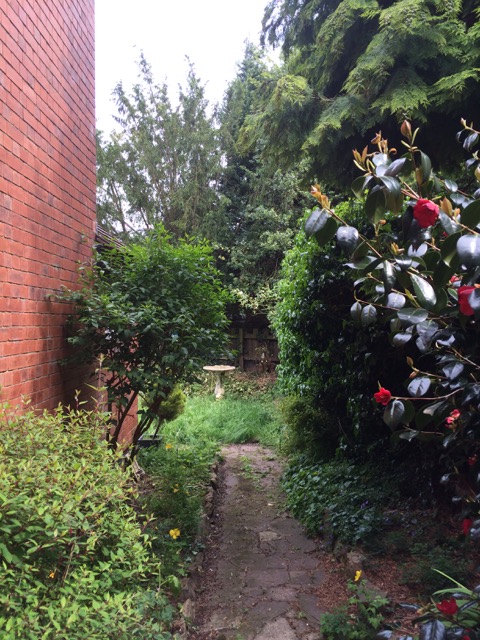
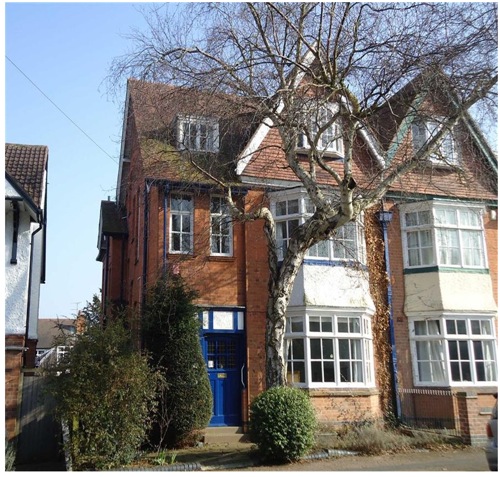
In other news, a lovely family has bought the house next door, our matching Edwardian “twin” house which has been empty for some time. When I first met K she described how, when she was thinking of buying and renovating the house, she discovered my blog. Not only was it a blog about renovating an Edwardian house but it was a blog about the identical house next door! How about that? No sooner had they got their keys than they got to work. There are painters and builders and architects coming and going – it brought back memories! They also turned their attention to the garden. Above you can see the massive conifer that sat on their property between the back sections of our adjoining houses.

It is so big that I couldn’t get it all in one shot!

On Thursday morning the tree surgeons got to work.

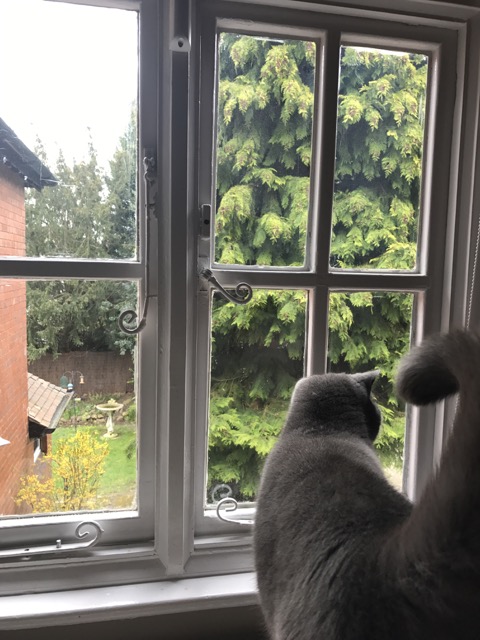
Of course, Ruby was the first to realise that something interesting was going on. It may have reminded her of the tree that we had cut down as soon as we moved in.

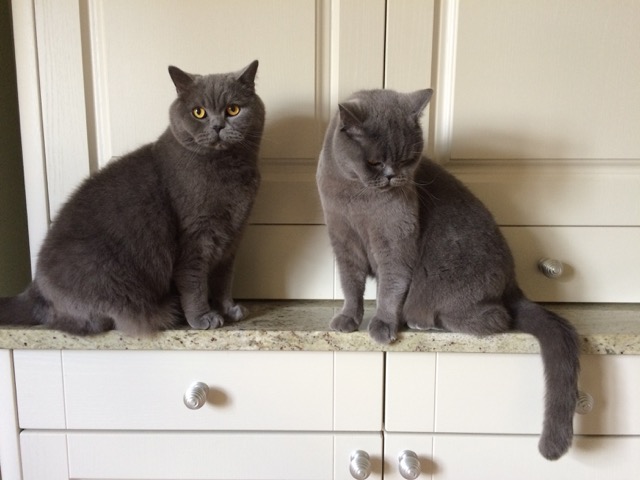
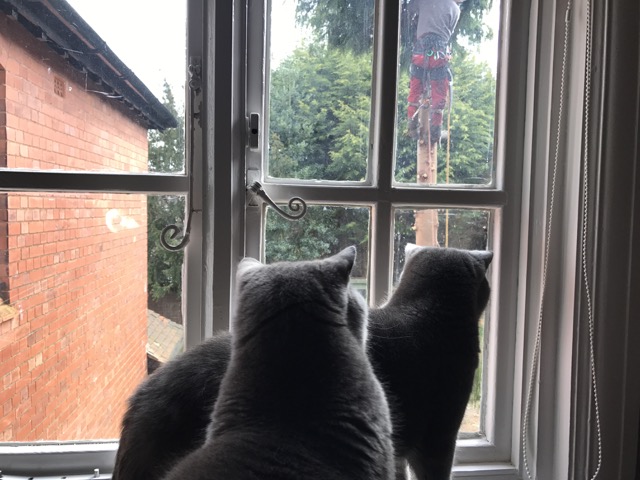
The commotion  began to attract quite a feline crowd.

The men made short work of the tree.

It wasn’t long before it was down.

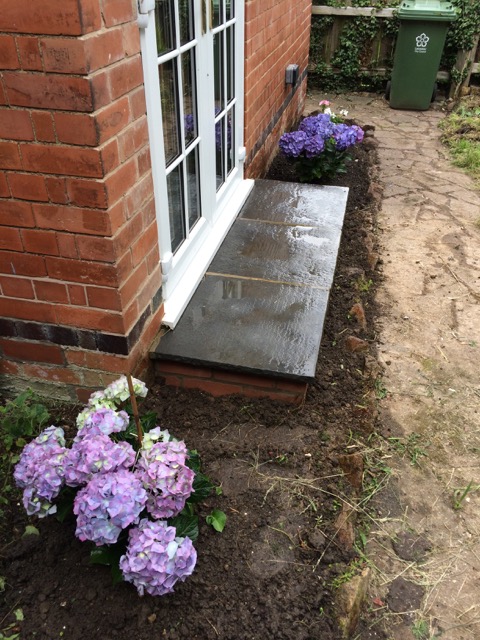
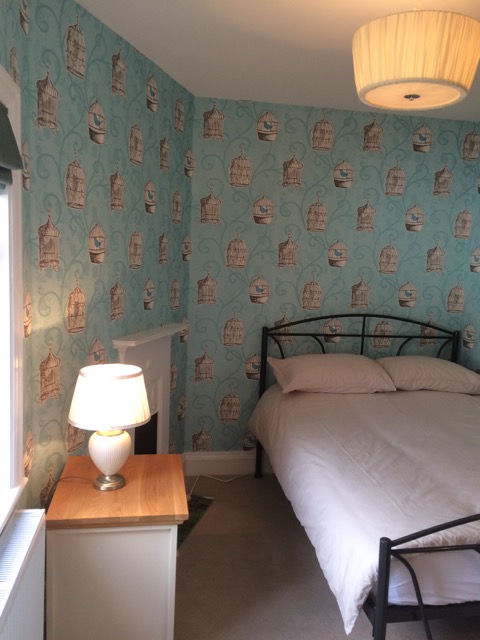
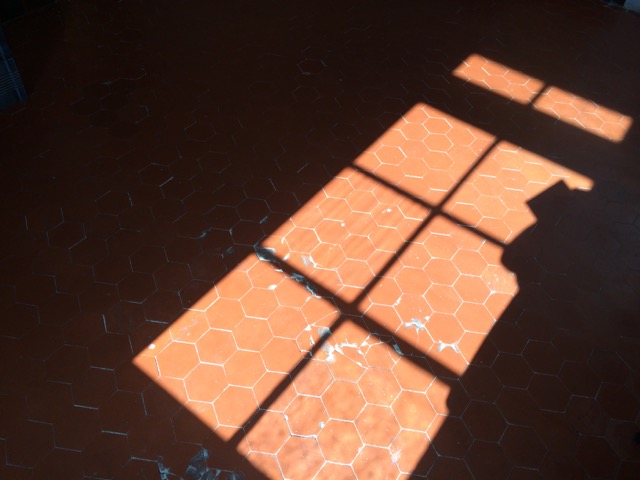
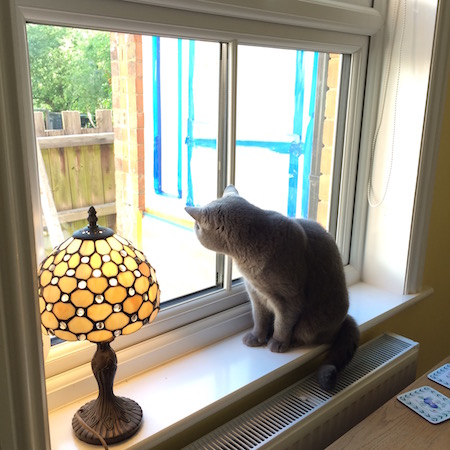
It’s incredible what a difference it has made to the light levels in the rooms at the back of the house, such as the dining room and my study. I will have to clean the windows more regularly now that the sun can come streaming through!

Oliver and Ruby were jealous that only Rose featured in the last post. To make up for it, here is Oliver on the stairs.

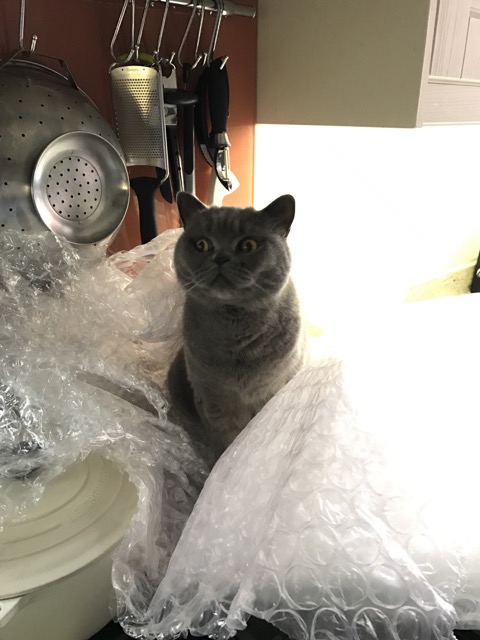
Ruby with bubble wrap.

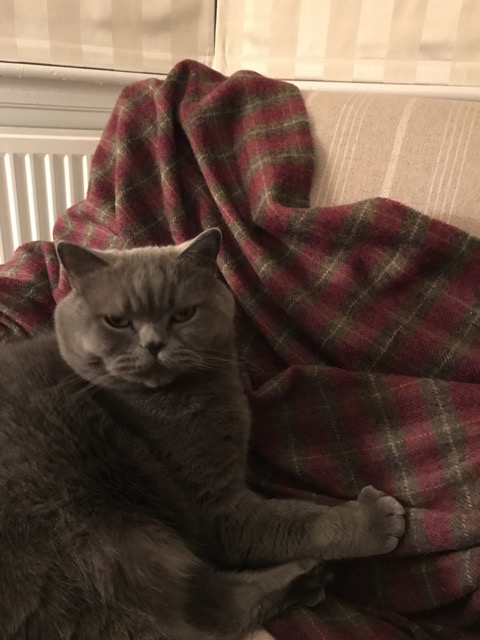
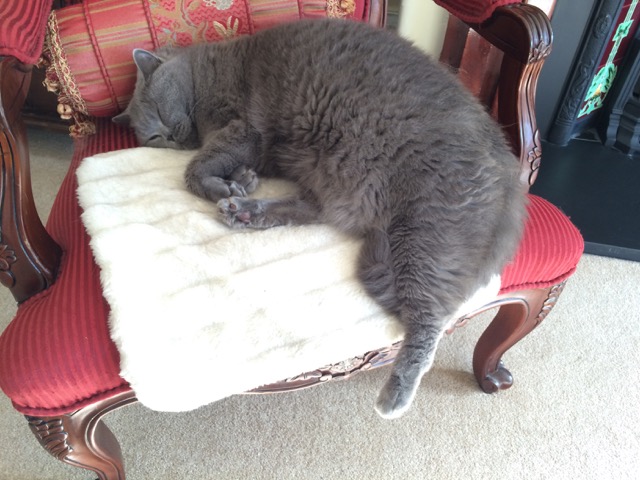
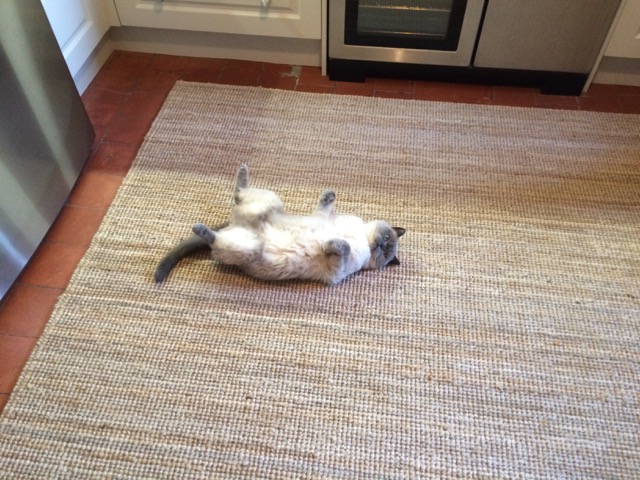
Oliver taking possession of a new, and rather expensive, throw rug that became a cat blanket quicker than anticipated.

And Ruby staring down her arch nemesis, the neighbour’s cat, Albus.

With renovations next door and building work behind, it is going to be an exciting, if a little noisy, summer. However, I think it is a good sign that all this property development is occurring in our area. More to follow!

Midsummer in the Edwardian House

IMG_2388Here we are in midsummer and as you can see the front garden is going well.

IMG_2366The lavenders are enormous and attract so many bees. I counted a total of 36 bees on the four plants this afternoon when I was watering them. Mostly the big bumble bees but some honey bees too.

IMG_2107I cut some of the lavender and have hung it to dry. Ruby inspecting.

IMG_2368The Japanese anemones (Pretty Lady Susan) are in flower.

IMG_2364As are the hydrangeas.

IMG_2365The Lisaura will flower in late summer.

IMG_2146 (1)Here is one of the lilies from our friend Mindy, who brought the bulbs from her own garden in Portland, Oregon when she and her husband John came to stay and look after the cats for us last year.

IMG_2367The two larger types of Japanese anemones (Montrose) are budding.

IMG_2296Out the back, the fern garden is looking good. I have put bark chips down to help keep the soil moist and the weeds at bay.

IMG_2291I tidied up the corner down the side of the house by the gate for my garden tools and bought this storage box. This was where the pile of logs had sat since the giant silver birch was cut down when we first moved in. On the weekend I moved the logs across the road to our neighbours as they have a wood burning fire and can make good use of them next winter.

26308181325_ff0fc6651d_oNow, here is a photo of the back garden from a few months ago, complete with squirrel stealing the bird food. As you can see the garden was a bit of a mess. Everything was neglected and overgrown, there was bindweed and brambles/blackberry bushes everywhere. The first thing that I did was cut back a lot of the vegetation behind the birdbath there, which I blogged about in my last post. It was a kind of privet growing in amongst the holly tree. I cut it all back and it took several weeks to get rid of all the cuttings in our garden waste bin. I also started to clear the garden beds.

IMG_1851This is that back right hand corner after I cleared it and dug away a lot of the soil. The original plan was to get quotes for a new fence along the back but, as you can see, there is a bit of a rock retaining wall here and the soil level has risen with all the years of leaf litter from the trees, meaning that the fence is buried about a foot under ground level and would take major excavation work to remove.

IMG_1855Here you can see what bad condition the back fence was in. The missing palings, however, were good for the hedgehogs, as they need to be able to roam freely between gardens to feed and breed.

IMG_1856Further along you can see that part of the fence has caught fire at some point in the past. Also the position of the neighbour’s shed means that access to replace this section of the fence would be almost impossible.

IMG_1854The same goes for the structure in our other neighbour’s garden.

IMG_1884My solution was to attach brush screening to the fence to create a more pleasant looking boundary. I also cut back some of the lower branches of the giant yew tree in the garden behind ours.

IMG_2396It makes a big difference, so I plan to put some more along the fence along this side too. In the back corner you can see that I have planted some ivy to obscure the low breeze block retaining wall. I have also planted some Spotted Laurels and small cypress trees and continue to weed the garden beds. The lighter-coloured and variegated foliage on these plants will be an effective foil to the dark green of the yew, holly and conifers that dominate the rest of the garden.

IMG_2148This was taken a few weeks later and you can see that the privet is growing back nicely and the holly looks much neater with all the lower branches removed. If you look closely you will also see the neighbour’s cat keeping a watchful eye on proceedings from the roof of the shed.


IMG_1875

I kept a section of the screening open for the hedgehog to get through.


IMG_1916Here is a shot of the hedgehog. We haven’t seen him for a few weeks but they do have a big territory. Unfortunately hedgehogs are not very good at crossing roads, so we hope he is OK.

IMG_1928Down the other side of the house I have been tidying things up too. There is still a lot of weeding to do here too.

IMG_1848By the back door I have weeded and cleared the beds and planted hydrangeas, the old fashioned mop-head variety. What with the crazy paving and rockery borders, this is a very mid-century garden so I am continuing the theme with what I call “granny plants”.

IMG_1847Also geraniums, pink and white.

IMG_2130This was my latest purchase. Combined with the strimmer I bought a few weeks ago, I have started to tackle the grass.


IMG_2308After the first mowing. It almost looks like a real garden!

IMG_2314Cat updates. Hello from Oliver – I think he needs to do more to relax.

IMG_2041The same goes for Ruby, pictured here during our recent heatwave.

IMG_2257And Rose. She is playing with the catnip mouse – the look in her eyes says it all.

Early Summer in the Edwardian House

IMG_1079Here we are in early summer. There have been a good few warm days so far and also some very heavy rain yesterday. This means that the garden is having an explosive growth spurt. All of the spring bulbs are spent, as are the primroses, although a few yellow pansies remain.

IMG_1081Hydrangea with new growth.

IMG_1082The lavenders have doubled in size.

IMG_1085Hydrangea at the other end of the garden bed also looking healthy.

IMG_1084Last week I planted this new Japanese maple to replace the other one that was planted last year. This one has more robust leaves so I hope it will withstand the exposed position a little better. The other one kept drying out as its leaves were like little feathers.

IMG_2210This is what the front garden looked like a year ago when we were right in the middle of Stage 2 of the renovation.

IMG_2225It’s good to look at photos like this and see how far we have come.

IMG_0997Out the back the fern garden is coming along nicely. You can see that I have moved the Japanese maple with the delicate leaves to this more protected postion.

IMG_1010The view from the kitchen window is improving. Avert your eyes from the crazy paving path and the leaning fence. All in good time…

IMG_9809With the new fern garden in place, we decided it was time to scatter the ashes of dear old Doris and Orlando. Doris died in Australia in 2009 and Orlando in Liverpool in 2011.

IMG_9810We scattered their ashes in the garden bed around the Dicksonia Antarctica fern that was imported from Australia.

IMG_0369Doris and Orlando loved their fern garden back in Australia, so it’s only fitting that they should have one here in the UK too. You can also see a more mature Dicksonia Antarctic tree fern that Doris is lying under on the left of the photo.

IMG_9638Oliver and Ruby are well.

IMG_9817As is Rosie, who had her fifth birthday in late April.

IMG_0919I finally got around to framing this limited edition print by the artist Paul Bommer which illustrates Christopher Smart’s poem “For I will consider my cat Jeoffrey”.

IMG_0921It was one of the first things I bought for the Edwardian House when we moved in.

IMG_0923

It’s a great piece and I could look at it for hours.

IMG_0922It is in the breakfast room right next to the cat tree.

IMG_0973

In the back garden I have cleared one corner that was dominated by an overgrown holly tree and a shrub underneath it. The entire back fence will need to be replaced so I am just trying to clear it enough for access. The soil level is quite high here too as this was an old garden refuse heap, so we will need to do some digging to lower the ground level.

IMG_0985The lawn hasn’t been cut for three years, though I am managing to get a handle on controlling the bindweed that used to grow in the beds by the compost bin.

IMG_0981I am also tackling the other pest – the blackberries. It’s just about keeping the whole back garden under control until we can re-landscape it.IMG_0984At least you can still see the path down the other side of the house.

IMG_0978

The wall of ivy has this year’s new growth too.

IMG_1002Our neighbour’s beautiful lawn. If only we could annexe her garden somehow…

IMG_9684Grey squirrel helping herself to the bird food.

IMG_0936In the guest bedroom we have replaced the single bed with a double, in preparation for summer guests.

IMG_0354

In other news, we had a nice time on our holiday to the Cote d’Azur.

IMG_0027We stayed in Nice.

IMG_0364Lovely views from the Colline du Chateau (Castle Hill).

IMG_5904We had a day where we drove along the Grande Corniche past Eze, Monaco and Menton and went into Italy.

IMG_5912Eze from the Grande Corniche.

IMG_6121Dolceacqua in Italy.

IMG_0048We visited Renoir’s house in Cagnes-sur-Mer.

IMG_0069Built around the same time as the Edwardian House it was great to see that Renoir also had a quarry tile floor in the kitchen.

IMG_0070It’s just like ours except his tiles are hexagonal and ours are square.

20706119370_1b0723e2d6_o

Interestingly, when I visited Monet’s house in Giverny last year with Frogdancer, he also had a quarry tile floor. I’m glad we kept ours.


Spring in the Edwardian House

IMG_9732This is the first Spring for the front garden since it was completed. For early colour I recently planted some primroses and pansies.

IMG_9727Also emerging are some of Paddy Fraser’s old bulbs that must have still been in the soil.

IMG_9733Paddy’s daffodils among the primroses. In fact, I also transplanted the fuchsia primrose in the centre of the picture from the back garden, so that was Paddy’s as well.

IMG_9728The Japanese Maple is coming back to life, as are the hydrangeas.

IMG_9719The lavenders are looking healthy and strong and will really take off this year.

IMG_9718Not being an avid gardener, this front garden is a manageable size for me.

IMG_0230How the front garden looked before we began the renovation.

IMG_9702Not so manageable is the generally untouched back garden, or ‘hedgehog sanctuary’, as we like to call it. Last week I rearranged the old pavers to form temporary stepping stones to the bird bath and bird feeder in one direction, and the compost bin in the other. The grass is a soggy, muddy, mossy mess and will have to go one day when the garden reaches the top of our budgetary priorities. I envisage a large area of paving for a BBQ and outdoor seating surrounded by lush garden beds. The back garden is far too shady for a healthy lawn to grow.

IMG_9706Last weekend I also dug out the path at the side of the house again, as it was covered in fir needles and there were bluebells sprouting through the cracks. Down by the dining room’s French doors the camellia is looking very healthy and has a profusion of buds. The fuchsias are starting to leaf and that shrub on the right is starting to flower (not sure what it is).

IMG_9714In the spirit of tackling the garden in small, manageable bits, today I planted the fern garden on the other side of the house. You may remember that this was created in Stage 2 of the renovation. Originally a servant’s courtyard, this space was paved and gave access to the Edwardian coal store and servant’s toilet, which now form part of the breakfast room, utility room and downstairs toilet. Before and after pics here.

IMG_9696Among the plants in the fern garden I planted this, a Dicksonia Antarctica. It’s a tree fern from Australia.

IMG_9695It has been imported from Victoria and when I opened the box it smelt exactly like the Dandenong Ranges National Park.


2005_1211Image0039

Here are some tree ferns growing in the last fern garden we planted – 11 years ago in our old house back in Australia. Goodness the sun was bright back there.

IMG_9715This is a much smaller fern garden than that one though, but it is what I can see from my kitchen window and will look lovely when it is established.

Screen Shot 2016-04-09 at 1.49.00 pmI was also wondering why the blog was experiencing a spike in hits recently, then I found this link referral on an American website.

Screen Shot 2016-04-09 at 1.49.16 pm

We’re famous.


Early November

IMG_7966It’s early November and the autumn leaves are falling fast in today’s windy weather. Oliver thinks he can catch them as they drift by. Yesterday the window-cleaning/gutter-clearing man fitted leaf guards in the five downpipes to stop them blocking up.

IMG_7962Rosie looking gorgeous on the stairs.

21978416103_72be30a9d6_zRuby getting into mischief.

22060743194_52fd76d8fe_zWe have spent the last couple of Sundays tidying up the garden at the side of the house. Mark tackled weeds, blackberries and even excavated the dirt covering the mid-century crazy-paving path that leads down to the dining room french windows.

22060800204_6e9b33e923_zThe path is still a bit dirty but the rain should clear some of that. Eventually we will cover the path with weed matting and lay gravel down, like we did in the front garden. I also want to plant ferns in these garden beds as it’s very shady along here. The camellia on the right loves growing in this shade and produces beautiful red flowers. The fuchsias to the left of the path also thrive. In the distance you can see that we moved the bird bath as it wasn’t attracting birds where it was originally placed. I originally sited it directly outside the breakfast room window where the cats had front row seats on the window sill.

22657529346_5e5bfa9c7f_zYou can also see we have completed the back garden. Only kidding. I just lay the spare pavers down temporarily on the overgrown lawn for something to look at from the back door.

Next Thursday afternoon the Lord Mayor is coming to unveil the blue heritage plaque and we have about 35 people coming for a reception. Luckily we won’t need to use the back garden! More to follow.

Post Stage 2 Saturday

IMG_2885

You didn’t think it was over did you? On Saturday morning, D the plasterer came by to apply the render to the external wall of the new conversion. Ruby watched as he masked up the area. An hour or so after he began the doorbell rang, and when I answered it there was D – doubled over with blood coming from his hands and legs. He explained that his ladder had tipped over and he had fallen while he was doing the render on the very top part of the wall. I established whether or not he had hit his head (no) and whether he thought he needed a doctor or ambulance (no), and then applied first aid to his cuts. Both his shins had horizontal cuts and bruises where he had hit the ladder, and the skin on the side of his left hand had been sheared off. The most worrying part was that he thought he had hurt his back. He was also very pale from the shock. He sat down for a while and said that he was feeling a bit better. Then he got back on the ladder and finished the job! I told him he should go home but he wanted to finish it. There was a spectacular hand-print slide on the rendered panel where he must have tried to prevent his fall.

IMG_2897

By the time he finished it was a perfect job. It just needs painting now.

IMG_2890I cleaned and organised the top floor bathroom.

IMG_2889The shower looks great and the water pressure is much better than the shower it replaced.

IMG_2893Basin unit with the mirror and shelf I installed almost two years ago when we first moved in.

IMG_2901Then we planted out the garden beds. There are lavender, foxgloves, hydrangeas, weigela, bluebeard, Japanese Anemones, and a Japanese Maple.

IMG_2903I will report on garden growth at regular intervals.

IMG_2905Looking good.

IMG_2899Around the side will be the next area we plant – ferns and perhaps a dwarf rhododendron.


Stage 2, Day 34


IMG_2720Yesterday, in the guest bedroom, I painted the insert in the fireplace black, and this morning I cleaned the hearth tiles.

IMG_2646

I also prepared the floor for the new carpet. There were a few loose boards that I screwed down and I adjusted one that had a very loud creak. I also vacuumed thoroughly, especially around the skirting boards to prevent dust eventually staining the edges of the carpet.

IMG_2726The carpet fitters began by laying dust-paper and followed with the underlay.

IMG_2734An hour or so later – done!

IMG_2738Looking good.

IMG_1628How it looked just a few weeks ago.

IMG_2741The hearth tiles clash with the wallpaper but I wanted to have them on show anyway.

IMG_0725

Do you remember when I revealed this fireplace about eighteen months ago?

IMG_1664And how I found the fire pieces up in the chimney a few weeks back?

IMG_2751Wallpaper close-up.

IMG_2779Oliver, Ruby and Rose inspecting at the end of the day.

IMG_2773Ruby was first over the threshold.

And Rose was the first to christen the carpet with her claws.

IMG_2743Carpet on the landing leading to the back stairs.

IMG_2753T the decorator continued undercoating them today.

IMG_2754The neat carpet edge at the top.

IMG_2728T also gloss-painted the doors on the top floor. Cupboard.

IMG_2731Bathroom. He also started to fill the woodwork in the utility and toilet.

IMG_2770P the plumber was here too. All the fixtures are now connected.

The new downstairs toilet possesses the most forceful flush I have ever witnessed.


IMG_2771Utility room tap.

IMG_2729Top floor toilet and shower.


IMG_2732The room is looking huge!

IMG_2760Externally, work continued on the new planters.

IMG_2761A slight adjustment is being made to the alignment.

IMG_2758The fence has been repaired.

IMG_2756Our neighbour will be very happy with that. I am too – I love the castellated top of the old fence palings and that’s an extremely sturdy new post.

IMG_2724

At the side of the house, the site of the old servant courtyard will become the fern garden.

IMG_2725

All cleared and ready for topsoil.

IMG_2767I had noticed for a few days that this drain around the side appeared blocked. The last time the builders were here I had to unblock it as it became filled with sand and rubble which obstructed the P-trap. This time it was much more difficult to clear.

IMG_2768I had to break it up with the trowel to get it out – it’s mortar that has been poured or washed into the drain and had set solid. I hope for my builders’ sake I got it all! Luckily I had a CCTV scan of all the drains just before work began so we can always make a comparison if necessary.

IMG_2765Finally, at the end of the day, after everyone had gone home, the gravel arrived. It was delivered by a lone man with a pallet trolley – no crane. Each of these bags literally weighs a tonne – 1000kgs. The poor man struggled so I had to help him push the load up the very slight incline to their final position. It was hard going even with the two us. I can’t believe they allow one person to deliver such a heavy load. He was a strapping Eastern European but as he said to me in halting English “I am not horse!”


Stage 2, Day 31

I think this post will take the record for the most number of photos, so bear with me. Or scroll until you find something that interests you.IMG_2516Dawn, though it’s light here from around 4am. Sadly for the little tree on the far left it would be its last day. It was ugly, with prickly leaves, tangerine coloured flowers that turned into little sour purple berries that even the birds didn’t seem to like. We are taking the front garden back to a blank slate.

IMG_2522D and A did a lot of digging.

IMG_2524Still unearthing roots from the old silver birch.

IMG_2526These are some of the smaller roots. A and D were hacking at them with a saw but then decided to go and buy a giant axe.

IMG_2528They also hit a line of bricks running along the footpath. They were red bricks laid neatly in a header course so I don’t think they were foundations for a wall. My guess is that this was the original level of the front garden and these were the bricks marking the boundary. They were the same bricks that the  stump grinder hit in the middle of the tree trunk, which means that the tree, which was around eighty years old, grew over the bricks.

IMG_2546You can see that there is no straight line along the footpath so we will fix that.  You can also see how the ground level has risen, burying the bottom eight inches of the fence.

IMG_2547Progress by the end of the day. While all this was going on I discovered that Waitrose have an online Garden Centre that does home deliveries, great for someone who doesn’t have a car. It is the most brilliant site as you can search for any type of plant according to garden style, position, soil type, eventual height, flower colour, everything. I ordered all the plants for the front garden, filtering my choices to ensure they are all bee-friendly.

IMG_2525These pavers are going to become planters along the front of the garden. The larger ones are for stepping stones around to the side gate.

IMG_2562The carpenters were also here today. They finished fitting as much of the utility as possible, though the sink unit and worktop can’t be fixed until the plumbing is done. They made the cutout in the iroko worktop for the Belfast sink with a router. The offcut will be made into a nice chopping board.

IMG_2563Cornice work on the units.

IMG_2555They fitted skirtings, architraves and doors. This door for the toilet  has been reclaimed as it was originally the door into the old scullery, which became a kitchen in the 1950s and is now our breakfast room. It will look better when it’s painted.

IMG_2556New rim latch and knob. The dent in that panel was made when the door was in its original location – when opened it would hit the handle from the door on the servant staircase. I’ll have to remind T the decorator not to fill it as I like that it tells a story.

IMG_2554Now for our Alice in Wonderland door.

Favim.com-28208I’m less sure about the success of this one. This door has be re-sited from its original location, which was the cold store larder. In order to fit the new narrow space a great deal of the door had to be trimmed, so much so that there is barely anything left!

IMG_2553The door will be open most of the time though. I might do a trawl on eBay and see if I can locate a door more in proportion to the space. Once it’s painted, however, it may look fine.

IMG_2558They also built a shelf for that space above the door.

IMG_2550I got up on a ladder to see how it fits.IMG_2551

It’s a nice job and it will be a perfect place to store Chrismas decorations, picnic baskets and such.

IMG_2518Architrave around the stained glass toilet window. This is fast becoming my favourite room in the house. Perhaps because it’s the only room we have actually created from nothing. This was originally the covered courtyard space used to access the servant toilet and the coal store.

IMG_2543The breakfast room has become a building site. The servant toilet used to be about where the cat tree is sitting, and that space on the right with the little window used to be the cold store larder.

IMG_2541They also removed the suspect piece of picture rail in the lounge. When P the damp-proofer saw it a few weeks ago he said the swelling and cuboid-like cracking pointed, potentially, to dry rot.

IMG_2538No rot! It was just a big knot in the wood that had bulged out of shape.

IMG_2540Other cracks caused by the nails. That was a releif.

IMG_2544The carpenters also completed other little jobs around the house. The threshold from the hallway into the kitchen was fixed down. You can hardly see the plugs covering the screw holes.

IMG_2566They trimmed and refitted the top bathroom door.

IMG_2564Top floor cupboard door reversed and now with the rim latch refitted.

IMG_2565Original paintwork on the latch. As far as I can tell, all of the woodwork started out either stained dark brown or was painted this buff brown colour. You can see it also under the flaking paint on the door surround. At various other times the woodwork has been mint green and navy blue.

IMG_2567Little bit of skirting refitted in the top floor bathroom.

IMG_2157T, the decorator, worked on the servant stairs. Original dark wood finish to the stairs. I ripped out the original carpet runner last year. For weeks after we first moved in we thought we had some sort of gas leak in the back of the house but it turned out to be the smell of that carpet.

IMG_2158Door with its original stain. The darker brush marks were intended to give the impression of a more expensive hardwood.IMG_2521

Looking up the stairs. T painted the walls first.

IMG_2529Then the timber was given its first coat.

IMG_2530You can already see how much brighter it is going to be.

IMG_2023Looking down before.

IMG_2534And after.

IMG_2535The landing was also painted.

IMG_2537And the old servant bell.

IMG_2532Looking through to the guest room.

Much more to occur this week as we push through to the completion of Stage 2. The guest room is part of the Stage 2 challenge as it needs to be ready for Frogdancer, whom I am meeting up with in London next week.

Stage 2, Day 27


IMG_2351Today two carpenters, D and S, were on site working from 6am. On the external elevation of the conversion they fixed battens and boards to the block-work, fitted the window, and constructed the Tudor-effect frame. They have even filled the screw holes with dowel to give the appearance of pegs that would have been hammered into traditional mortise and tenon joints in medieval and Tudor architecture. They accomplished a lot, though I’m not sure the neighbours appreciated the power saw in the back garden at 6:30.

IMG_1484In my original, highly-detailed and accurate ‘plans’ you can see I envisaged a second horizontal timber above the window. In the end the proportions of the wall meant that this would have been an excessive detail so we dispensed with it. The omission of the extra horizontal highlights the vertical timbers and the triangular shape.

IMG_2350I then began seeing the same shape all over the house. Paneling on the stairs in the entrance hall.

IMG_2349Triangles in the dormer windows. T the decorator was also here again today. The top floor bathroom got its first coat. We are going with all white in this room.

IMG_2344It goes better with the travertine tiles than the magnolia wall colour did.

IMG_2347T also made a start on the not-creepy, but very triangular, top floor cupboard. There was a lot of old wallpaper to scrape off the original walls. Looking bigger and brighter already.

IMG_2364The stained glass leadlight window in the toilet looks great.

IMG_2362It will have a very deep sill – it almost looks medieval in its depth, like a mullioned window in a castle.

IMG_2367Thankfully the Edwardian glass appears to be obscure enough in terms of the privacy needs of this room.

IMG_2365Except for this central lozenge with its literally rose-coloured glass. Note the air bubbles in the hand-blown pane.

IMG_2363The carpenters also began to fit the architraves. They will be back later in the week.

IMG_2352It’s finally starting to warm up after a very cool start to June. The triffid plant is gradually taking over the back garden as it does each summer. It will grow white trumpet shaped flowers and then die off again in the winter, giving the hedgehog a nice little arbour to hibernate under. I just Googled it and it’s called Bindweed and is a pest plant.

IMG_2360Against all odds, something actually looks pretty in our wild, overgrown garden. A stray branch of a rose bush, engulfed by ivy and blackberries, reaches out eight feet above ground level to produce this! A dozen roses.

IMG_2357They smell divine, look beautiful but aren’t great for the bees as they are inaccessible for nectar and pollen. My eventual plan with the garden is to plant as many bee-friendly flowers as possible. This will do for now though!


Stage 2, Day 14

IMG_1721The pavers on our new back step have been mortared in.

IMG_1727Now we just need to work on the garden to make it worth stepping outside!

img_4791How it used to look a year ago.

IMG_1712The coal store is definitely looking like a room now.

IMG_1713Further lining, cladding and such-like occurred. Site of the future basin in the toilet.

IMG_1717We are going to get a cupboard door installed in the triangular ‘loft’ space; a great place to store the Christmas decorations.

IMG_1714Pipework for the new toilet. The red brickwork is less than a year old as that was once the doorway through to the old servant’s toilet. It will be a shame to cover it really.

img_4826How it used to look a year ago. We’re installing a high-level cistern toilet in the new space as a nod to the house’s past. It will be nicer than this though, trust me.

img_1971This is now the breakfast room! Seeing pictures like this makes you realise how much has been accomplished in the last year.

IMG_1728The brickwork is now complete on the new wall; it makes the old part of the wall on the left look rather shabby. Everything else here will be black-and-white timber and render. I blamed P the plumber for all of yesterday’s grit in the kitchen but I realised this morning that some of it was from the cutting of these grey bricks. All the doors were closed today as more bricks were cut, which made a big difference.

Screen Shot 2015-05-28 at 11.45.51 amHere is the collection of colours for the utility room and toilet. The walls will be Farrow and Ball’s Cinder Rose (pink) and the wainscoting Vert de Terre (green). The units for the utility will be cream and the floor black and white tile.