Stage 2, Day 19

IMG_1909
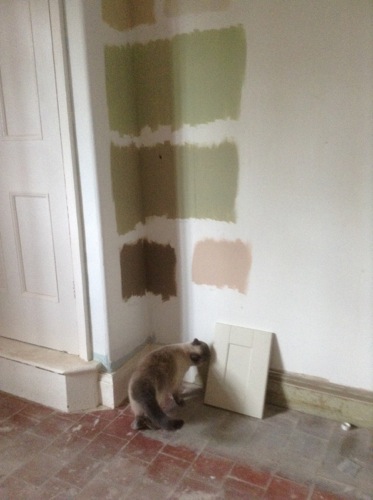
Oliver, Ruby and Rose were prisoners today as there was just too much going on inside the main part of the house. It was for their own safety: there were open widows, several trades in and out, roof cavities exposed, so I managed to get them all in the bedroom. Oliver was under the bed hiding anyway, Rose asleep on the bed, but it was Ruby I had to lure in.

IMG_1908She was all ready to help P the plumber with the shower installation.

IMG_1935

When P the plumber positioned the shower tray in the top floor bathroom it became clear just how small the shower I bought actually was. I hate being a client who changes their mind (especially this late) but this was a significant problem. It’s just the guest bathroom for us but it would also be a shower we might use if ever the boiler broke down. Also this is the only ‘family’ bathroom with a shower (the big shower is on our en suite and there is just a large bath in the other bathroom), so a new owner might have teenage or adult family members who would use this bathroom regularly. P and I got the internet and ordered another, bigger shower. I can sell this one on eBay.

IMG_1937

The plastering in the utility and toilet were completed.

IMG_1938

Such sharp lines.

IMG_1940

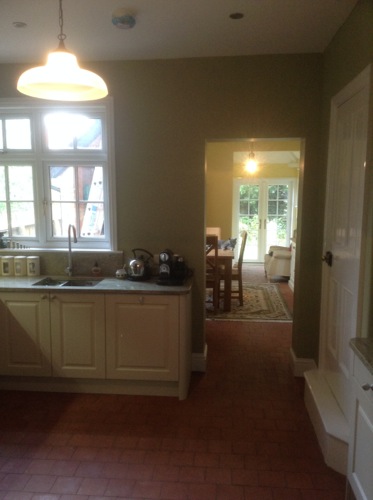
The vaulted ceiling looks great – I am thinking that I might dispense with the door on that loft space as the ceiling has become such a feature in this room. I have a couple of wicker hampers from last Christmas that I could use up there to store things in – or I could buy some more from the here (thanks iODyne!) the right size for the space.

IMG_1939Blue sky through the skylight. Luckily it is starting to warm up now.

I have engaged P the decorator again and he will be starting next Friday. He and T will decorate the utility room and toilet, the bathroom, the guest bedroom and the back staircase. I ordered decorating supplies today.

100230

In the utility and toilet I have decided to lighten the colour of the walls to Farrow and Ball’s Calamine, which we had in our dining room in our last house. It’s a very pale pink and it changes in different lights. This will go well with the utility room cabinetry and the black and white floor. I also decided to dispense with the wainscoting in these rooms – just too busy in terms of the small space and it would also mean too many colours.

0341397_l3

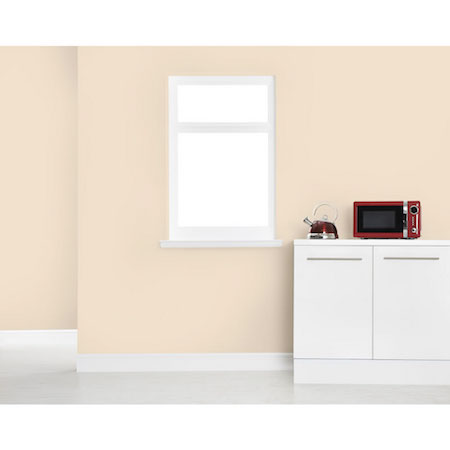
For the back stairs and top floor bathroom I have got some standard Dulux Magnolia (pictured above). Many British people loathe Magnolia. I’m not entirely sure why but they can be quite vehement about it – perhaps because it was a colour big in 1990s and popular with landlords, so it either reminds people of rented or outdated properties. I don’t mind it though and it will probably be good to have some basic neutrals in the house.

house white

Call it Farrow and Ball’s House White and everyone loves it again…

IMG_1956

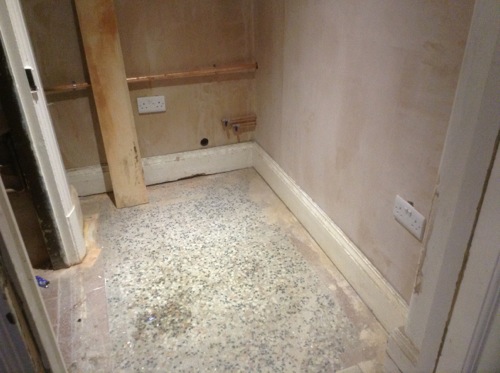
The bathroom floor was stripped ready for the ply to be laid. Looking at the room empty it could easily be a single bedroom and I imagine that originally it was, probably for a child or even their Nurse.

IMG_1895

The plasterer patched the walls where the removal of the old tiles damaged them.

IMG_1893And along the basin tile line.

IMG_1943

The lounge repair had its skim coat.

IMG_1951

The creepy top floor cupboard is having a makeover! It will be creepy no more.

IMG_1952

Today it was over-boarded where the plaster was cracked or missing. It will be skimmed tomorrow.

IMG_1936

In between the stripping and over-boarding, the old hole that Oliver and Ruby explored was reopened. I took the opportunity to have a look into the roof space of the back section of the house.

IMG_1919

That hole is only cat-sized, so I had to lay down on the floor and peer through, taking photos with my phone. I tell you, when we’re finished I don’t think there’ll be an inch of this house that I don’t know.

IMG_1918

I am glad to report that there were no wasps nests! That’s insulation in the bottom part of the picture.

IMG_1922

There was, however, an old bird’s nest in one corner. The birds would have got in through some holes near the roof line that were repaired during the last stage of the renovation. No dead birds as far as I could see. The water stains on the rafters look old, and the roof has been repaired, so I hope they’re OK. No sign of mould or rot.

IMG_1954Creepy top floor cupboard door off its hinges – that could be original paint on the inside.

IMG_1955Rim latch and knob.


Stage 2, Day 17

IMG_1818Today plasterboard continued to go up in the utility room and toilet and they’re looking like proper rooms now.

IMG_1820The space is completely lined. For some reason the location of the wall light has moved way off centre on that wall. It will need to be fixed before it’s skimmed. In this country plasterboard gets skimmed with another layer of plaster – in Australia plasterboard is just filled and painted.

IMG_1825The storage place above the door will be handy.

IMG_1823Not sure what this patching is. It looks a bit like skimming plaster but the plasterers haven’t started yet.

IMG_1831I am continuing to clear out the guest room – I have had to move my decorating centre into the hall.

IMG_1832I also put a few paint tester blocks on the wall for the hallways (not that they’re a decorating priority at the moment). That bright blue is out of the running (Farrow and Ball’s St Giles Blue). The other colours are Cornforth White, Elephant’s Breath, Lamp Room Grey, Oval Room Blue and Purbeck Stone. Considering carpet colours too. Oliver and Ruby most closely match the darkest grey but I might go for one of the lighter ones – having carpets a similar colour to the cat fur means it won’t show up so much, especially during shedding season. Three cats all with double coats means a lot of fur on the carpet; every time I vacuum I could just about knit a new cat with the fur in the Dyson.

IMG_1836Rosie protesting my handling of her beloved carpet samples. I think her choice is a bit too light so it may be that mid-grey.


Build Day #100

Well, we have reached 100 days of building!

2014-06-03 09.38.44First, Miss Rose and her adventures. Archive shot here – the top floor dormer window. A the carpenter was building the internal frame for the new window the other day when he left them open. Each day at the end of work I thoroughly check the house for open windows, doors, or any potential danger to the cats. I think that because this work was done in the ‘safe’ area for the cats on the top floor I wasn’t as vigilant as I should have been, plus I was focused on how we could re-hang the curtains to notice that the windows were open wider than usual.

IMG_4795Another archive shot. Rosie decided to explore the outdoors through that top window. My guess is that she lost her footing on the steep roof tiles and fell to the ground. It was only when I was closing the windows on the dining room ground floor that I spotted a shocked Rosie outside the doors. She was very unhappy and bleated at me through the glass. She is an indoor cat and has never, ever, been outside. She was very happy to come back in.

IMG_4895The view before she must have fallen. They don’t call them cat-slide roofs for nothing.

Photo on 12-09-2014 at 08.10Miss Rose with her grazed chin – luckily this was the only injury she sustained in her fall.

IMG_4278

On Day 100 the Great Wall was dismantled, reuniting the top floor with the rest of the house.

IMG_1657The Great Wall on the day of construction.


IMG_4280Now removed – the view from the top floor. All three cats are in this picture if you look carefully.

IMG_2698 - 2013-06-11 at 17-12-00We also moved into the new kitchen. Before shot.

IMG_4285And after.

IMG_4291I have already baked bread and cakes and prepared more fried food that I care to admit (the burners on the top floor kitchenette cooker would always cut out if they got too hot!).

IMG_4300We have also moved the cats down into their new room.

IMG_4304Cat show ribbons and the dresser.

IMG_4305Oliver and Ruby’s ribbons are on the far left. The rest belong to Rose, including her Premier medal and ribbon from the Supreme Show (the cat version of Crufts).

IMG_4302Ruby on the relocated cat tree surveying her new domain.

IMG_0840How it looked before.

IMG_4310The view though the kitchen.

Screen Shot 2014-09-14 at 19.33.49A before and after shot of the breakfast room.


IMG_4313Externally, T the painter has almost finished. JB replaced the cast iron downpipe too.

IMG_4316You will also notice my colour choice for the front door – gloss black. I am very happy with it. It reinforces the Edwardian fascination with Tudor black and white architecture.


Build Day #76

IMG_3733Typical morning scene. After breakfast Rose and Ruby have taken to sharing the spare duvet (that’s English for doona) and Oliver has just been looking through the window at the pigeons who sit on the chimney.

IMG_3757Carpentry work. The restored casement window has been refitted. The casement on the right is awaiting its new pane. The bathroom window had the cracked pane replaced as well but I forgot to take a picture.

IMG_3736Skirting boards recycled from elsewhere in the house have been fitted in the utility cupboard.

IMG_3742And in the entrance hall.

IMG_3737The resized canopy panel has arrived and once more the kitchen has been pulled apart. It will be all be assembled soon…

IMG_3744The second ceiling rose has been fitted. This is the one in Mark’s study.

IMG_3745The third rose has been fitted and is awaiting its outer ring.

IMG_3746Here is the fourth Rose.

IMG_3748Awaiting a head scritch.

IMG_3738Red!

IMG_3739Farrow and Ball’s ‘Incarnadine’ in the dining room.

IMG_3740Gorgeous. I like it even better than ‘Blazer’, which we had in Liverpool.

946228_140471349489338_850348158_nOur Liverpool house for comparison. Blazer had a more yellow hue.

IMG_3741This is darker and is more towards blue in spectrum.


Build Day #75

IMG_3715Hello yellow!

IMG_3716The breakfast room is coming together quickly now. The topcoat of Farrow and Ball’s ‘Dayroom Yellow’ has been applied. It’s bright and cheery and when the sun shines you might need your sunglasses!

IMG_3713In the dining room the lining paper has been hung and the ceiling has had some undercoats.

IMG_3709P the painter discovered a spillage problem when he opened today’s paint delivery – it looks like a massacre! Farrow and Ball are sending a replacement tomorrow. The colour is called ‘Incarnadine’ – I am embracing colour in this renovation. There is a trend at the moment for cool neutrals – different shades of grey are very popular but I just don’t think they would work in our house. Plus I won’t be associated with ‘fifty shades of grey’ in any way.

IMG_3728Plastering and patching continued in the toilet.

IMG_3725And bathroom.

IMG_3719Pipes were a bit of a theme today. Pipes installed under the kitchen sink.

IMG_3720New downpipes being assembled.

IMG_3721The redundant downpipe by the coal store was removed. You can see where the door to the servant’s toilet was bricked up (now part of the breakfast room). In Stage 2 of the build (scheduled for some time next year, hopefully) this little porch area outside the coal store will be turned into the downstairs toilet.

IMG_3724The blocked downpipe at the front of the house was disassembled. You can see all the algae where it has been leaking and causing damp in the lounge room wall.

IMG_3706The downpipe was full of this black, rotting leaf litter and there were roots in the pipe at ground level. This meant that during rainfall the pipe would simply fill up and overflow. It’s why I would always hear a gurgling sound in the bedroom when it rained outside, nothing was draining through the pipe.

IMG_3704The pipe is clear now and it will be reattached when the underground pipe is cleared of tree roots (or replaced).

IMG_3722The soil stack pipe at the side of the house is ready for connection.

IMG_3718We also have a tap in the kitchen! No water yet though. Ruby is going to love drinking from that. She will probably learn how to turn it on.

IMG_3714In the en suite some of the cabinetry was fitted. It’s getting exciting now.


Tiles

Last week I ordered tiles for the en suite and bathroom. I was all ready to go to one of those big tile warehouses but I thought I’d start local. The Stoneygate shops are just around the corner and there is a gorgeous tile shop that sells Porcelanosa, Swarovski and Versace tiles…I know, dangerous. I was completely honest with P the tile merchant about my tile budget and he expertly guided me to some great choices and I got a fantastic deal on Porcelanosa – Spanish porcelain tiles.

PORCELANOSA-Ona-Natural

In the en suite I will have a feature wall of these wavy tiles called Ona Natural Waves.

venis_ona_natural_33_3x100s0

They are in a light grey color and are beautifully textured and three dimensional. Each tile is about 50 centimetres long.1374571744-4154

Matching floor tile called Madagascar Natural, though the colour isn’t quite right in this picture.  Porcelanosa-Madagascar-Natural-Tile

In the shower there will be the plainer  Madagascar Natural wall tile from floor to ceiling. They look a bit like concrete breeze blocks in the picture but they are beautiful in real life.

5_201Then these jet black Mini Dual mosaic tiles will sit inside the two recesses in the shower as an accent.

Screen Shot 2014-06-30 at 19.13.01This is the wall colour I have chosen for the en suite – Farrow and Ball’s ‘Pelt’.


2014-06-30 18.50.45I was looking for something go with the grey so Oliver obliged by stretching himself over the colour chart.

2014-06-30 18.47.12

His little aubergine paw pads were the perfect colour to complement the tiles, so ‘Pelt’ it was. Rosie is jealous because she wanted me to go with light blue, like her eyes…

33129e4700372670_1600-w501-h376-b0-p0--home-designIn the main bathroom and toilet I am using Pocelanosa Yakarta tiles in a light beige. They have the look and texture of straw matting or some sort of coarse woven fabric. This is the wall tile.

home-designMatching floor tile.

8527086_origThis is the accent tile that will be used behind the basin and for the front of the bath.

product_clunch-farrow-and-ballA simple neutral for the walls called ‘Clunch’.


Build Day #48

IMG_2890A mostly plumbing day.

IMG_2892

The main bathroom got its first fix. Future bath. There is not going to be a shower in this bathroom but the bath will have one of those extendable shower hoses eg. for washing dogs, or children, not that we have either of those. It will be a nice big bath. The house will still have two showers  – one in the en suite and one in the guest bathroom.

IMG_2891Future towel radiator on the left and basin on the right.

IMG_2896In the kitchen I applied the first coat of the top coat to the walls. Looking good.

IMG_2895

It’s covered so well I might only need to patch a few areas after the kitchen is installed. The photos from my iPad Mini don’t do the colour justice:  Farrow and Ball’s ‘Ball Green’.

IMG_2921The afternoon exploration.

10340139_261851464017992_2240922406219393647_nSame room, same trio, eight months ago just after we moved in.

IMG_2944Ruby on a mission to sniff out new smells.

IMG_2905Rosie insisting on her close up.

IMG_2898Oliver being scared of his own shadow. He has been very wary of his environment for a couple of weeks now, even when upstairs. I’m sure it must be difficult with all the change going on but we think Ruby has been telling him scary stories about monsters hiding under the furniture. I have ordered a Feliway diffuser – I’ve never tried it before – so we will see if that helps calm him down. It’s only just started happening, so it’s not just the build going on that’s spooked him. I think there was a time a few weeks back when men were working on the ceiling on the second floor and Oliver though there was something in the floor below him. Perhaps he thinks that all the men sleep here at night and are hiding…complex thoughts and emotions for such a simple boy. As the boy cat and at the top of their little hierarchy I guess he has a lot more to lose than his sisters.

IMG_2910He soon gets over it though. He loves this bare expanse of wall. He goes mad for it.

IMG_2912I can just imagine when it’s painted – it will be covered in scratch marks.

IMG_2926Rosie needing another close up.


Monday

IMG_2882I won’t give today a Build Day number as there was no-one here but me. I put on my painter’s cap and got to work.


IMG_2887I gave the breakfast room ceiling a second coat. I’m using a trade paint from Dulux for the ceilings – it’s very thick and goes on like butter – beautiful.

IMG_2862I painted the soffit of the servants’ staircase white to match the ceiling and make it stand out from the wall colour as a feature.

IMG_2863Not as sure what to do with this. There is a small steel beam boxed into this part of the ceiling that holds up the chimney in the room above. This is where the servants’ toilet used to be. I couldn’t decide whether to paint it white like the ceiling or the same colour as the walls. I have decided to paint it the same colour as the walls so that it doesn’t stand out. I can always change it later if it looks odd.

IMG_2858I have also changed my mind on the colour of the breakfast room. The brighter yellow, Dayroom Yellow, is now appealing to me particularly after I gave the test patch a second coat, taking away some of the fluorescence that was coming through from the white underneath. The darker yellow, Hay, has dried quite brown, whereas I wanted a definite yellow in that room. I know that Homer chose this colour, and once I announced the decision to Mark he came out in favour of it too, as did Pam.

IMG_2883In the kitchen I began cutting in the wall colour, Farrow and Ball’s ‘Ball Green’. When Mark came home he helpfully suggested that I had missed the middle bits.

IMG_2885I think the green goes very well with the quarry tile floor.


Build Day #47

IMG_2843Today was Saturday but we still had a couple of trades here. The en suite walls were plastered.

IMG_2844You can see the future shower taking shape. The pipe running through the wall is our temporary water supply upstairs. It won’t be a permanent feature of the en suite.

IMG_2845The pipe snakes through the floor to the new water connection downstairs.

IMG_2846Mark’s future study got its ceiling plastered. To be consistent I should probably just call it Mark’s study, as I don’t refer to other rooms with a ‘future’ prefix.

IMG_2847When it first goes on, the plaster looks like milk chocolate. Could you imagine? The ceiling wouldn’t last long in this house it if was!

IMG_2857The roofers were also here today applying new lead to the front top floor dormer window. That room is our current bathroom and will become the guest bathroom. We currently only have one window upstairs as the front and rear dormers are boarded up while the new windows are made. It’s a bit dark. At some point we must take care of the wobbly fence and that rickety, rotten white fence post that looks like the Leaning Tower of Pisa. You can also see the skip is overflowing – we may have to pay for a fifth!

IMG_2855Close-up of the newly leaded window.


IMG_2848

I was also very busy decorating today. I had to make sure I protected the unsealed quarry tiles before I began.

IMG_2851I sanded and prepped the breakfast room and gave it a mist coat.

IMG_2849Once you start painting things always look lighter and brighter.

IMG_2850I tested my two yellows for the breakfast room. The top one (Dayroom Yellow) was far too bright – almost an acid yellow. The one below called Hay is more subtle and is in the same tonal range as the Ball Green in the kitchen, so I think I will go with that.

Build Day #39

IMG_2673It was time to say goodbye to the window in the future guest room.

IMG_2676This is the leaking window in the dormer that is responsible for the collapsing ceiling in Mark’s future study below, as well as the wet rot (with a fruiting body no less!). On closer inspection you can see that it has been repaired many times. There are brackets, sticky tape and Blu-tac holding it together – if you were to push on the lower right pane the glass would fall out (something we are grateful the cats didn’t discover). Plus this casement is held on by only two screws.

IMG_2679I had to cover the whole room with dust sheets to protect it as this is part of house we inhabit. The cats had to stay in the top floor front room all day while the work was being done.


IMG_2681The window removed. Along with all those problems the wet rot had turned the bottom part of the window into a hollow, flaky mess. The wood was as light as cork and even more spongy. I got the carpenter to save the latches and casement stays though, as they may come in handy with other windows.

IMG_2693A piece of the timber affected by wet rot, featuring fruiting bodies.


IMG_2680A, the carpenter, and JB working at making the new frame.

IMG_2691The window has been boarded up for the next week while the new window is made.

IMG_2686It was also a big day as many of the new radiators were hung. Dining room.

IMG_2687Lounge.

IMG_2688The feature radiator in the kitchen.

IMG_2700It’s very tall and thin and has three rows of pipes with a kind of retro look. Mark says he like it because it “screams warmth”.


IMG_2690Breakfast room.

IMG_2692Mark’s future study.

IMG_2695Servant’s bedroom.

IMG_2694Rear landing. There were also a few more that I haven’t photographed yet.

IMG_2683The period cast iron radiator from the entrance hall has been sand-blasted and will now be repainted.

IMG_2684I spent most of the day painting the walls where radiators were about to be hung. I also had a chance to test some of the sample pots for the kitchen. I tried them in this corner because it was a place where kitchen units will be built so I won’t have to worry about painting over the samples. It also meant I could see the colours in full light as well as shade.

IMG_2712In the footsteps of previous decorators (such as L Johnson in 1935) I wrote on the wall, leaving our names and the date for someone in the future to discover.

IMG_2698Miss Rose checking a sample of the kitchen cabinetry against the different colours.