Property Maintenance (and some cats photos at the end)

IMG_9500A couple of weeks ago I looked up at the ceiling in the entrance hall and saw this. Guess what’s directly above? The en suite shower room. I had completed some overzealous cleaning of the shower a few days before and hoped that the stain was perhaps from something like a small gap in the floor tile grouting where I has spilled water. When I got my tape measure out though, the stain sat directly underneath the shower drain outlet above.

IMG_9501Upstairs I prodded the drain where it sits in the shower tray and there was water underneath the rim. When I unscrewed the drain section I could see that all the silicone inside it had expired and was wet and mouldy. At the same time I felt the drainpipe drop away from the shower base towards the ceiling below. Ooops. I called P the plumber and asked him about it. Without seeing it he said that he didn’t think the drain would be the culprit as they are basically fitted and then sealed and shouldn’t ever pose a problem. He suggested that perhaps some of the silicone around the base of the shower might be faulty.

IMG_9503

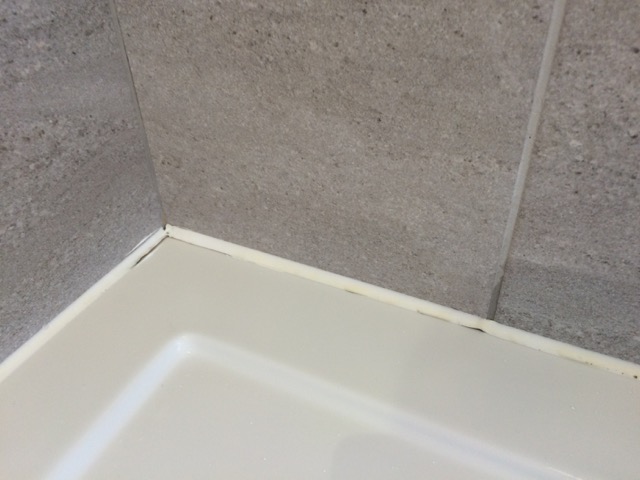
It was true that there were a few places where the silicone had started to come away, so we decided that I would dry out the shower and strip away all the silicone and P would come by later in the week to seal it all up. I cut away all the silicone and then prepped the surface by cleaning it with white spirit.

IMG_9506
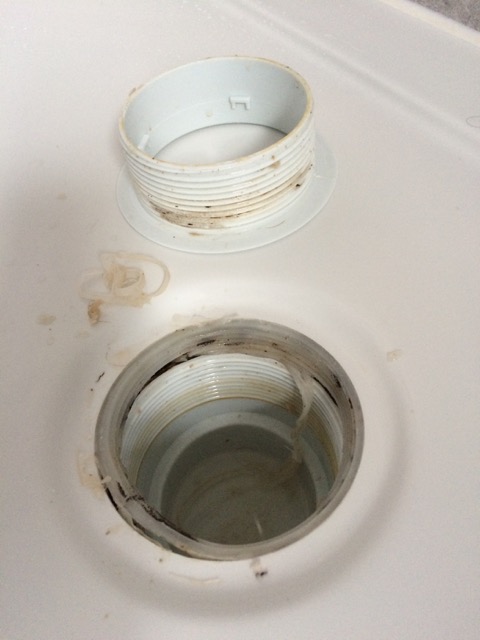
As I pulled the drain section apart I also discovered the rubber drain seal was all mouldy. This confirmed my belief that the drain had been leaking, all that mould doesn’t form overnight. I gave it a good clean.

Luckily we had the shower in the top floor bathroom to use while we waited for P the plumber. After using it a couple of times though, I noticed water coming from under the base of that shower too! Again I prodded the drain and there was water under that rim as well. P the plumber was very busy and a few days had passed. I had some silicone in the house and I have siliconed a shower base before, it just looked a bit messy, so I thought I would give it a try. I started by siliconing around the rim of the the top floor shower drain. When next we used it there was no leak! Emboldened, I decided to tackle the en suite shower too. It was a bit more difficult as there was quite a large gap between the shower base and the tiled walls, but I managed it in the end. I also re-sealed the drain, screwing it all together and re-siliconing it, making sure that there was a light ring of silicone around the rim too. Two weeks later and we are still leak free!

IMG_9540Continuing our theme of water and property maintenance, last week we had some major storms. Whenever it rains heavily I like to check that all the drains and gutters are flowing freely. The cascade coming from the gutter at the back of the house told me we had some problems. The gutter on the roof below it was overflowing too.

The next day, when it was dry, I inspected the lower gutter and downpipe. The plastic leaf guards that we had fitted in the mouths of the downpipes last year were blocking too quickly and easily. I cleared out the one I could reach with my step ladder. When I tested the downpipe with the garden hose though, it was still overflowing. The problem was underground, so I pulled the downpipe out of ground to inspect the pipe. Sure enough it was blocked with a mixture of silt and tiny fragments of terracotta roof tiles – when the roof was being repaired last year the gutters weren’t protected, so all the debris had been washed down the pipes. Underground drain clearing can be expensive, we know that from our experiences with our last house. Luckily I remembered that we had a Wet-and-Dry Vax machine under the stairs that we used in our last house when the cellar flooded (what is it about our houses and water?), so I though it would be worth a try. I brought the Vax out into the back garden and shoved the hose down the drainpipe and switched it on. A combination of vacuuming and hosing with water brought up about a cubic foot of debris. When I tested it again, all was draining properly! No pictures to show you of that episode, so you’ll just have to imagine it.

I couldn’t reach the rest of the gutters and downpipes so I needed to call in a professional.

IMG_9650

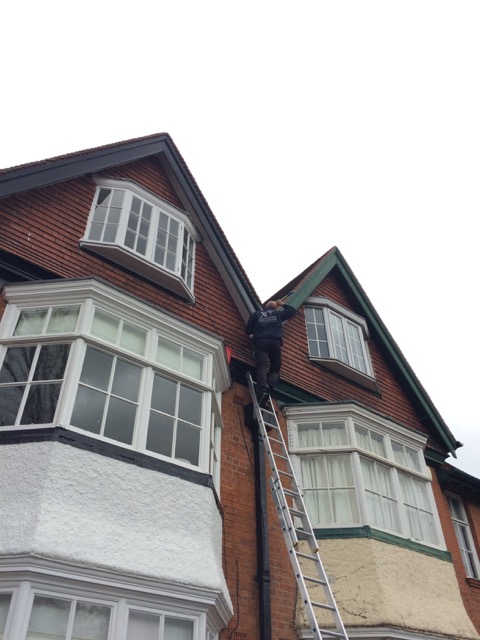
Today A, the window and gutter guy, came by. He inspected and cleared out the rest of the blocked gutters and removed the offending leaf guards. He could even reach the valley gutter between the two gable roofs of our house and the neighbours, which I had been worried about for some time. There was evidence of it having flooded some time in the past, as there had been blown plaster on the walls of the master bedroom before we renovated. It is far less likely to happen now as the giant silver birch has gone, and we maintain the house, but it still worried me, so I was glad that A was able to get up there with his ladder and clear it out. It was a long way up and looked precarious, but A’s other job is as a fireman, so he knew what he was doing. He even repaired some of the gable tiles and resealed where the downpipe goes through.

IMG_9543

Another of the gutters to block easily was the one at the front of the house way up above the front door. Here you can see it flooding in last week’s storm (the picture was taken from the window of the top floor bathroom).

IMG_9663Along this line of gutter, A installed gutter-brushes (which are like long bottle-brushes) to prevent leaves settling in the future.

IMG_9662As A also does window cleaning with special equipment, he was able to reach the really high windows that our regular window cleaner can’t reach. It was the first time the leaded windows along the top flight of stairs have been cleaned, which is great. As you can see, those windows are at the level of other houses chimney pots.

IMG_9659
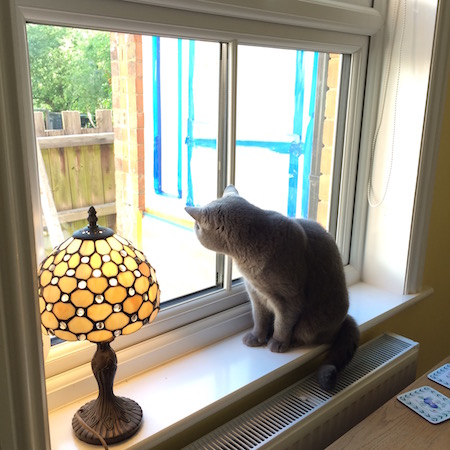
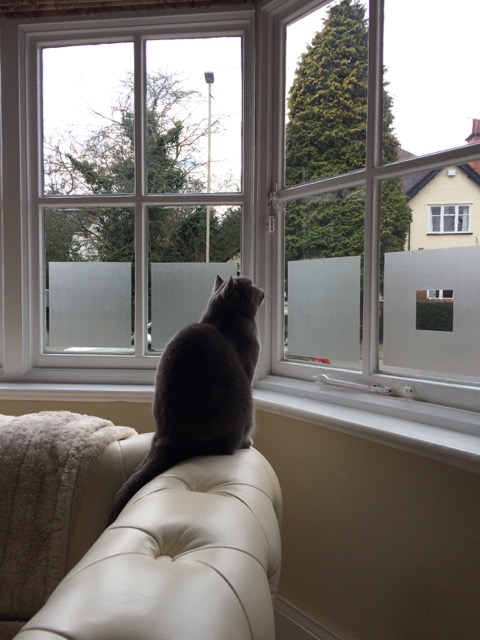
Ruby was fascinated by all the goings on.

IMG_9651
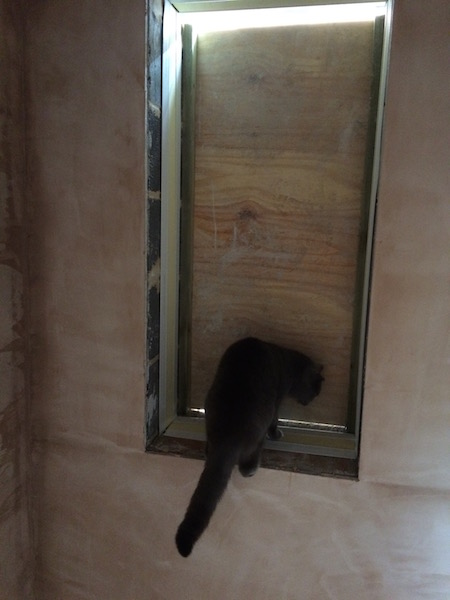
Rose seemed pretty relaxed.

IMG_9638
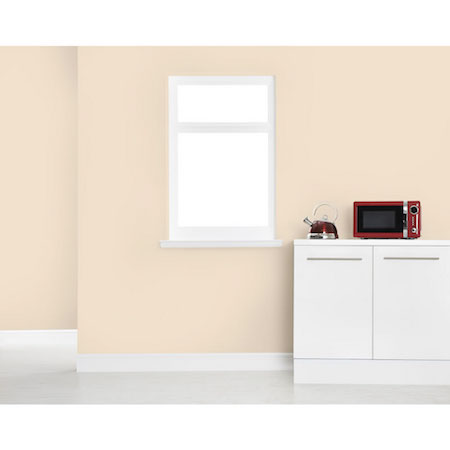
And here is one of Oliver and Ruby from yesterday. As you can see, they are not allowed on the kitchen benches.

Post Stage 2 Saturday

IMG_2885

You didn’t think it was over did you? On Saturday morning, D the plasterer came by to apply the render to the external wall of the new conversion. Ruby watched as he masked up the area. An hour or so after he began the doorbell rang, and when I answered it there was D – doubled over with blood coming from his hands and legs. He explained that his ladder had tipped over and he had fallen while he was doing the render on the very top part of the wall. I established whether or not he had hit his head (no) and whether he thought he needed a doctor or ambulance (no), and then applied first aid to his cuts. Both his shins had horizontal cuts and bruises where he had hit the ladder, and the skin on the side of his left hand had been sheared off. The most worrying part was that he thought he had hurt his back. He was also very pale from the shock. He sat down for a while and said that he was feeling a bit better. Then he got back on the ladder and finished the job! I told him he should go home but he wanted to finish it. There was a spectacular hand-print slide on the rendered panel where he must have tried to prevent his fall.

IMG_2897

By the time he finished it was a perfect job. It just needs painting now.

IMG_2890I cleaned and organised the top floor bathroom.

IMG_2889The shower looks great and the water pressure is much better than the shower it replaced.

IMG_2893Basin unit with the mirror and shelf I installed almost two years ago when we first moved in.

IMG_2901Then we planted out the garden beds. There are lavender, foxgloves, hydrangeas, weigela, bluebeard, Japanese Anemones, and a Japanese Maple.

IMG_2903I will report on garden growth at regular intervals.

IMG_2905Looking good.

IMG_2899Around the side will be the next area we plant – ferns and perhaps a dwarf rhododendron.


Stage 2, Day 35

IMG_2814I spent the entire day sorting out “stuff”. New shed-like space under the stairs for tools (and WD-40) until I get a real shed.

IMG_2806I got everything out of the sitting room and dusted and vacuumed. We still need to restore the fireplace, do a bit of decorating following the damp proofing, and get carpet. And a bookcase.

IMG_2801D the carpenter was here and he secured the worktop in the utility room and fitted the up-stands (that vertical bit of wood is just keeping them in place while the glue dries. T the decorator also did a lot of the gloss woodwork in here too. Unfortunately decorators and carpenters are mortal enemies – it’s the issue of dust. In Stage 1 the decorators downed brushes and left when A the carpenter was in the front garden using the bench saw while the decorators were applying gloss black paint to the front door and woodwork. I did my best to coordinate them today but unfortunately a carpenter and a decorator ended up in the same room at exactly the same time. They managed to work through it though. I then moved a lot of things into the cupboards.

IMG_2817T also repainted the walls in the top floor bathroom to remove  the plumber’s hand prints.

IMG_2813And he applied what must be the fourth undercoat to these stairs. It’s all in the preparation. It’s practically glowing in there.

IMG_2803Gloss white in the toilet too.

IMG_2805P the decorator was also here. He had kindly collected the additional wallpaper I ordered and finished papering the guest room.

IMG_2818In a final push, A and D finished the front garden. Beds ready for planting. The two tonnes of gravel I helped haul from the truck  yesterday were laid.

IMG_2820Stepping stones to the gate.

IMG_2827It makes such a difference!

IMG_2838

And peace was restored.

IMG_2837Rosie not sure what to make of the quiet.

IMG_2882Ruby inspecting the work.IMG_2825

Apart from a few odd jobs to complete, this was the end of Stage 2 for my builder. Thanks JB!

IMG_0230How the house looked two years ago in the sale brochure before we bought it.

Stage 2, Day 28

IMG_2380The cats we so stressed today at being confined, as you can see. Oliver being upside down.

IMG_2372Ruby and Oliver reverting to kitten sibling behaviour and grooming each other. It didn’t even end up in a wrestle. Rose was snoozing.

IMG_2376T, the decorator, was working upstairs. Top floor cupboard.

IMG_2374Looking good. Those are shadows on the back wall, not drips.

IMG_2377Clean and bright.

IMG_2739 - 2013-06-11 at 17-21-27What it used to look like. Cobwebs, spiders, peeling wallpaper, a mouldy window, extinct woodworm, an ancient water tank, lead pipes, collapsing ceilings, draughty holes into the roof…the list goes on.

IMG_2379The bathroom walls have had three coats now. White. The woodwork will be next. Gloss white. I’m reserving judgement – I think have become so used to colour on walls in the rest of the house that this feels a bit bland. I shall wait and see.

house2

The first house we built was entirely white, though perhaps white works better in a warmer, sunnier climate like Australia.


Stage 2, Day 27


IMG_2351Today two carpenters, D and S, were on site working from 6am. On the external elevation of the conversion they fixed battens and boards to the block-work, fitted the window, and constructed the Tudor-effect frame. They have even filled the screw holes with dowel to give the appearance of pegs that would have been hammered into traditional mortise and tenon joints in medieval and Tudor architecture. They accomplished a lot, though I’m not sure the neighbours appreciated the power saw in the back garden at 6:30.

IMG_1484In my original, highly-detailed and accurate ‘plans’ you can see I envisaged a second horizontal timber above the window. In the end the proportions of the wall meant that this would have been an excessive detail so we dispensed with it. The omission of the extra horizontal highlights the vertical timbers and the triangular shape.

IMG_2350I then began seeing the same shape all over the house. Paneling on the stairs in the entrance hall.

IMG_2349Triangles in the dormer windows. T the decorator was also here again today. The top floor bathroom got its first coat. We are going with all white in this room.

IMG_2344It goes better with the travertine tiles than the magnolia wall colour did.

IMG_2347T also made a start on the not-creepy, but very triangular, top floor cupboard. There was a lot of old wallpaper to scrape off the original walls. Looking bigger and brighter already.

IMG_2364The stained glass leadlight window in the toilet looks great.

IMG_2362It will have a very deep sill – it almost looks medieval in its depth, like a mullioned window in a castle.

IMG_2367Thankfully the Edwardian glass appears to be obscure enough in terms of the privacy needs of this room.

IMG_2365Except for this central lozenge with its literally rose-coloured glass. Note the air bubbles in the hand-blown pane.

IMG_2363The carpenters also began to fit the architraves. They will be back later in the week.

IMG_2352It’s finally starting to warm up after a very cool start to June. The triffid plant is gradually taking over the back garden as it does each summer. It will grow white trumpet shaped flowers and then die off again in the winter, giving the hedgehog a nice little arbour to hibernate under. I just Googled it and it’s called Bindweed and is a pest plant.

IMG_2360Against all odds, something actually looks pretty in our wild, overgrown garden. A stray branch of a rose bush, engulfed by ivy and blackberries, reaches out eight feet above ground level to produce this! A dozen roses.

IMG_2357They smell divine, look beautiful but aren’t great for the bees as they are inaccessible for nectar and pollen. My eventual plan with the garden is to plant as many bee-friendly flowers as possible. This will do for now though!


Stage 2, Day 24

IMG_2233First, I know that some of you have been missing the cats. Oliver and Ruby in their dungeon ie. the master bedroom, during today’s work. Look at them suffering on the mink throw and looking daggers at me.

IMG_2236Rose on the damask attending to her toilette. I even had the QVC shopping channel on for her.

IMG_2210This morning A and D turned their attention to the front garden. They began by digging up a lot of the crazy paving.

IMG_2214Then there were massive tree roots to unearth.

IMG_2227That looks like an enormous tree branch but it is, in fact, a root.

IMG_2228All cleared and leveled. Next the hardcore base was laid and compacted but I don’t have a picture of that.

IMG_2272And then the paving stones were laid.

IMG_2267We finally have a front path! We have to wait for the cement to dry before we can use it though. The path and front garden will vastly improve the street-appeal of the house.

IMG_2270J the tiler grouted the utility room. I can’t get enough of those tiles.

IMG_2269Just look at that edge where it meets the quarry tiles.

IMG_2280He also finished grouting the bottom section of the shower walls in the top floor bathroom.

IMG_2271And repaired the section of loose grout in the kitchen’s original quarry floor for me.

IMG_2206Finally he tiled the hearth of the open chimney breast in the dining room. Before.

IMG_2238And after: it really completes the room. J the tiler said they look like they have always been there. Most of the other fireplaces in the house have inset gloss tiles in red or green which is why I was drawn to these.

IMG_0876Here was Oliver a year and a half ago helping to uncover the fireplace tiles in my study. The original tiles as you can see are smaller but it is the same effect.

IMG_4491And the green tiles in the bedroom when I revealed that fireplace.

While we are talking about the dining room, you can see some before and after shots here.

IMG_2208B the electrician was also here today. Switch plate before (sitting too proud of the plaster).

IMG_2211And after. Hardly any damage done.

IMG_2209Wire for the unnecessary extractor fan before.

IMG_2212And now gone.

IMG_2222Old ugly pull cords in the top floor bathroom.

IMG_2241Decommissioned.

IMG_2279Replaced by a discreet switch for the shower above the bathroom door.

IMG_2282And a new switch for the light just outside, which is a legal requirement if you want to have bathroom light switches.

IMG_2276The new bathroom light was fitted but unfortunately the glass shade was cracked, so I have ordered a replacement.

IMG_2223Utilitarian light and pull cord in the kitchenette in Mark’s study decommissioned. The main light in that room will be enough, plus we will no longer be cooking in this room.

IMG_2224New light fitting for Mark’s study.

IMG_2283With its New York Tiffany shade.

IMG_2275New light fitting for the top floor landing. And new smoke detector.

IMG_2273The trunking on the landing was also neatened-up.

IMG_2217New light fitting for the servant stairs landing. It’s the same fisherman’s light that I have in the breakfast room and I will have a matching wall light in the utility room. It’s my attempt to keep the ‘story’ of the old servant areas of the house consistent by using more austere lights in those areas.

IMG_2218Ready for the new light shade in the guest room. This will be a non-austere room, however.

IMG_2265While B the electrician was on a break, I couldn’t help but utilise his ladder to have a look in the loft. I managed to get my head and shoulders through that hatch.

IMG_2254It’s a huge space up there, at least six feet high from the rafters to the apex with no cross beams. Lots of old insulation piled up everywhere though. I think I’d like to get one of those fold-down ladders to gain access to this space as it would be great for storage. I’m sure we could even do a loft-conversion and turn it into an extra bedroom but we don’t really need a fourth floor or another bedroom. I’m tempted to explore the possibilities one day though.

IMG_2258There’s also a redundant water expansion tank up here for the old heating system. I’m glad it’s a modern plastic one rather than an old asbestos example.

IMG_2240The plaster work around the guest bedroom window was also patched up. I had a couple of windows measured for blinds today, including this one. I also confirmed the carpet order for this room. My nine week guest room challenge is running on schedule. Tomorrow the decorators arrive!

Stage 2, Day 23

IMG_2202Late yesterday afternoon P the plumber came to fit the shower base, so technically that was Day 22 job. It’s a perfect size for the space we had.

IMG_2203

This meant that J the tiler could finish off the tiling around the shower this morning. I sold the other, smaller shower on eBay and got a good price for it. It was collected this afternoon.

IMG_2204

The tiler also finished laying the tiles in the utility. The boards are for the electricians to stand on tomorrow when they go in there.

IMG_2205

It’s an excellent transition from the quarry tiles – perfect levels. This floor will be grouted tomorrow.


Stage 2, Day 22

IMG_2198Today the tiler continued work. Grout on the bathroom floor tiles.

IMG_2199And walls. Still need the shower base fitted to complete this bit.

IMG_2186He also started laying the tiles in the utility room. I really like these black and white mosaics.

IMG_2189The utility cabinets and doors were delivered.

IMG_2187Enormous puppy bath. I mean Belfast sink.

IMG_2192A new mountain for Ruby to climb.

IMG_2197Iroko worktop.

Stage 2, Day 20

The end of week four.

IMG_1958

Oliver’s official name is Sentabali Top Drawer, but he seems to prefer the easy access to the bottom drawer here. He and his sisters spent the morning in the bedroom again while top floor work was carried out.

IMG_1953The creepy/spooky cupboard continued its makeover.

IMG_1959Plaster bonding coat.

IMG_1969Skimmed. No sign that there was ever a header tank in this room.

IMG_4091

This is where, last year, I found the newspaper sheets from 1928.

IMG_1971The cupboard ceiling and wall were skimmed too. Not spooky anymore.

IMG_1977The plasterer even did patching he wasn’t asked to do! Here, just outside the door where the old pipes used to run into the roof header tank.

IMG_1850This wall in the cupboard was just going to be decorated over. You can see the old wallpaper and the original gas pipe for the lighting.

IMG_1970All gone!

IMG_1851Some more old wallpaper from this room. Pre-1928.

IMG_1976The ply was laid in the top floor bathroom.

IMG_1972Wiring for the shower. I have never quite understood why it is illegal in Britain to have electric switches and sockets in a bathroom but they’ll let you stand naked in a metal framed cubicle with water running all over you that is heated in an electrified box three inches from your body. For a country terrified of electrocution they seem to be taking some pretty big risks.

IMG_1975Skim coat to patch the other wall. The shower I bought that was too small is now on eBay. So far I have one bid.

IMG_1980

The cats got their first view of the extension this afternoon. Oliver was the first downstairs; he was too busy sniffing the tools to notice the doorway was open.

IMG_1981Spotted.

IMG_1984And first over the threshold. The moment after this picture he leapt into the air when the plywood creaked under his weight.

IMG_1989Ruby was next.

IMG_1996Up on the window sill within moments.

IMG_1994

And finally Rose. As you can see the ply has  been cut for the utility and toilet. A few more screws to be fitted tomorrow and then it will be ready for the tiler first thing Monday morning.

IMG_1881

Do you remember me telling you about the men in vans who drive by the skip and scavenge metal? Today I found out from JB what they are called in the trade: skip rats.


Stage 2, Day 19

IMG_1909Oliver, Ruby and Rose were prisoners today as there was just too much going on inside the main part of the house. It was for their own safety: there were open widows, several trades in and out, roof cavities exposed, so I managed to get them all in the bedroom. Oliver was under the bed hiding anyway, Rose asleep on the bed, but it was Ruby I had to lure in.

IMG_1908She was all ready to help P the plumber with the shower installation.

IMG_1935

When P the plumber positioned the shower tray in the top floor bathroom it became clear just how small the shower I bought actually was. I hate being a client who changes their mind (especially this late) but this was a significant problem. It’s just the guest bathroom for us but it would also be a shower we might use if ever the boiler broke down. Also this is the only ‘family’ bathroom with a shower (the big shower is on our en suite and there is just a large bath in the other bathroom), so a new owner might have teenage or adult family members who would use this bathroom regularly. P and I got the internet and ordered another, bigger shower. I can sell this one on eBay.

IMG_1937

The plastering in the utility and toilet were completed.

IMG_1938

Such sharp lines.

IMG_1940

The vaulted ceiling looks great – I am thinking that I might dispense with the door on that loft space as the ceiling has become such a feature in this room. I have a couple of wicker hampers from last Christmas that I could use up there to store things in – or I could buy some more from the here (thanks iODyne!) the right size for the space.

IMG_1939Blue sky through the skylight. Luckily it is starting to warm up now.

I have engaged P the decorator again and he will be starting next Friday. He and T will decorate the utility room and toilet, the bathroom, the guest bedroom and the back staircase. I ordered decorating supplies today.

100230

In the utility and toilet I have decided to lighten the colour of the walls to Farrow and Ball’s Calamine, which we had in our dining room in our last house. It’s a very pale pink and it changes in different lights. This will go well with the utility room cabinetry and the black and white floor. I also decided to dispense with the wainscoting in these rooms – just too busy in terms of the small space and it would also mean too many colours.

0341397_l3

For the back stairs and top floor bathroom I have got some standard Dulux Magnolia (pictured above). Many British people loathe Magnolia. I’m not entirely sure why but they can be quite vehement about it – perhaps because it was a colour big in 1990s and popular with landlords, so it either reminds people of rented or outdated properties. I don’t mind it though and it will probably be good to have some basic neutrals in the house.

house white

Call it Farrow and Ball’s House White and everyone loves it again…

IMG_1956

The bathroom floor was stripped ready for the ply to be laid. Looking at the room empty it could easily be a single bedroom and I imagine that originally it was, probably for a child or even their Nurse.

IMG_1895

The plasterer patched the walls where the removal of the old tiles damaged them.

IMG_1893And along the basin tile line.

IMG_1943

The lounge repair had its skim coat.

IMG_1951

The creepy top floor cupboard is having a makeover! It will be creepy no more.

IMG_1952

Today it was over-boarded where the plaster was cracked or missing. It will be skimmed tomorrow.

IMG_1936

In between the stripping and over-boarding, the old hole that Oliver and Ruby explored was reopened. I took the opportunity to have a look into the roof space of the back section of the house.

IMG_1919

That hole is only cat-sized, so I had to lay down on the floor and peer through, taking photos with my phone. I tell you, when we’re finished I don’t think there’ll be an inch of this house that I don’t know.

IMG_1918

I am glad to report that there were no wasps nests! That’s insulation in the bottom part of the picture.

IMG_1922

There was, however, an old bird’s nest in one corner. The birds would have got in through some holes near the roof line that were repaired during the last stage of the renovation. No dead birds as far as I could see. The water stains on the rafters look old, and the roof has been repaired, so I hope they’re OK. No sign of mould or rot.

IMG_1954Creepy top floor cupboard door off its hinges – that could be original paint on the inside.

IMG_1955Rim latch and knob.